
How to Migrate from Redshift to Snowflake
Learn data validation and verification techniques to confirm a successful migration from Redshift to Snowflake.
Snowflake has become one of the most popular tools in the modern data stack for data lakes, data warehouses, and general-purpose data workloads. With more and more organizations looking to take advantage of Snowflake, that means a lot of data migrations from popular tools like AWS Redshift.
In this post, we’ll walk through the steps for a typical data migration from Redshift to Snowflake. Then, we’ll look at how a tool like Datafold’s Data Diff can help with data validation and verification, protecting data teams from common pitfalls in data migrations.
How to approach a Redshift to Snowflake migration
The typical data migration from Redshift to Snowflake can be broken down into the following key steps:
- Planning the migration from Redshift to Snowflake
- Connect to Redshift with Python
- Automate SQL translation
- Export the data out of Redshift to AWS S3
- Import the data into Snowflake
- Validate and verify with data diffs Let’s walk through these steps one by one.
Planning the migration from Redshift to Snowflake
A smooth migration starts with comprehensive upfront planning. Think about timelines, resource allocation, and stakeholder communication. Evaluate your existing Redshift configuration, data interdependencies, and established well-defined goals for the migration to Snowflake.
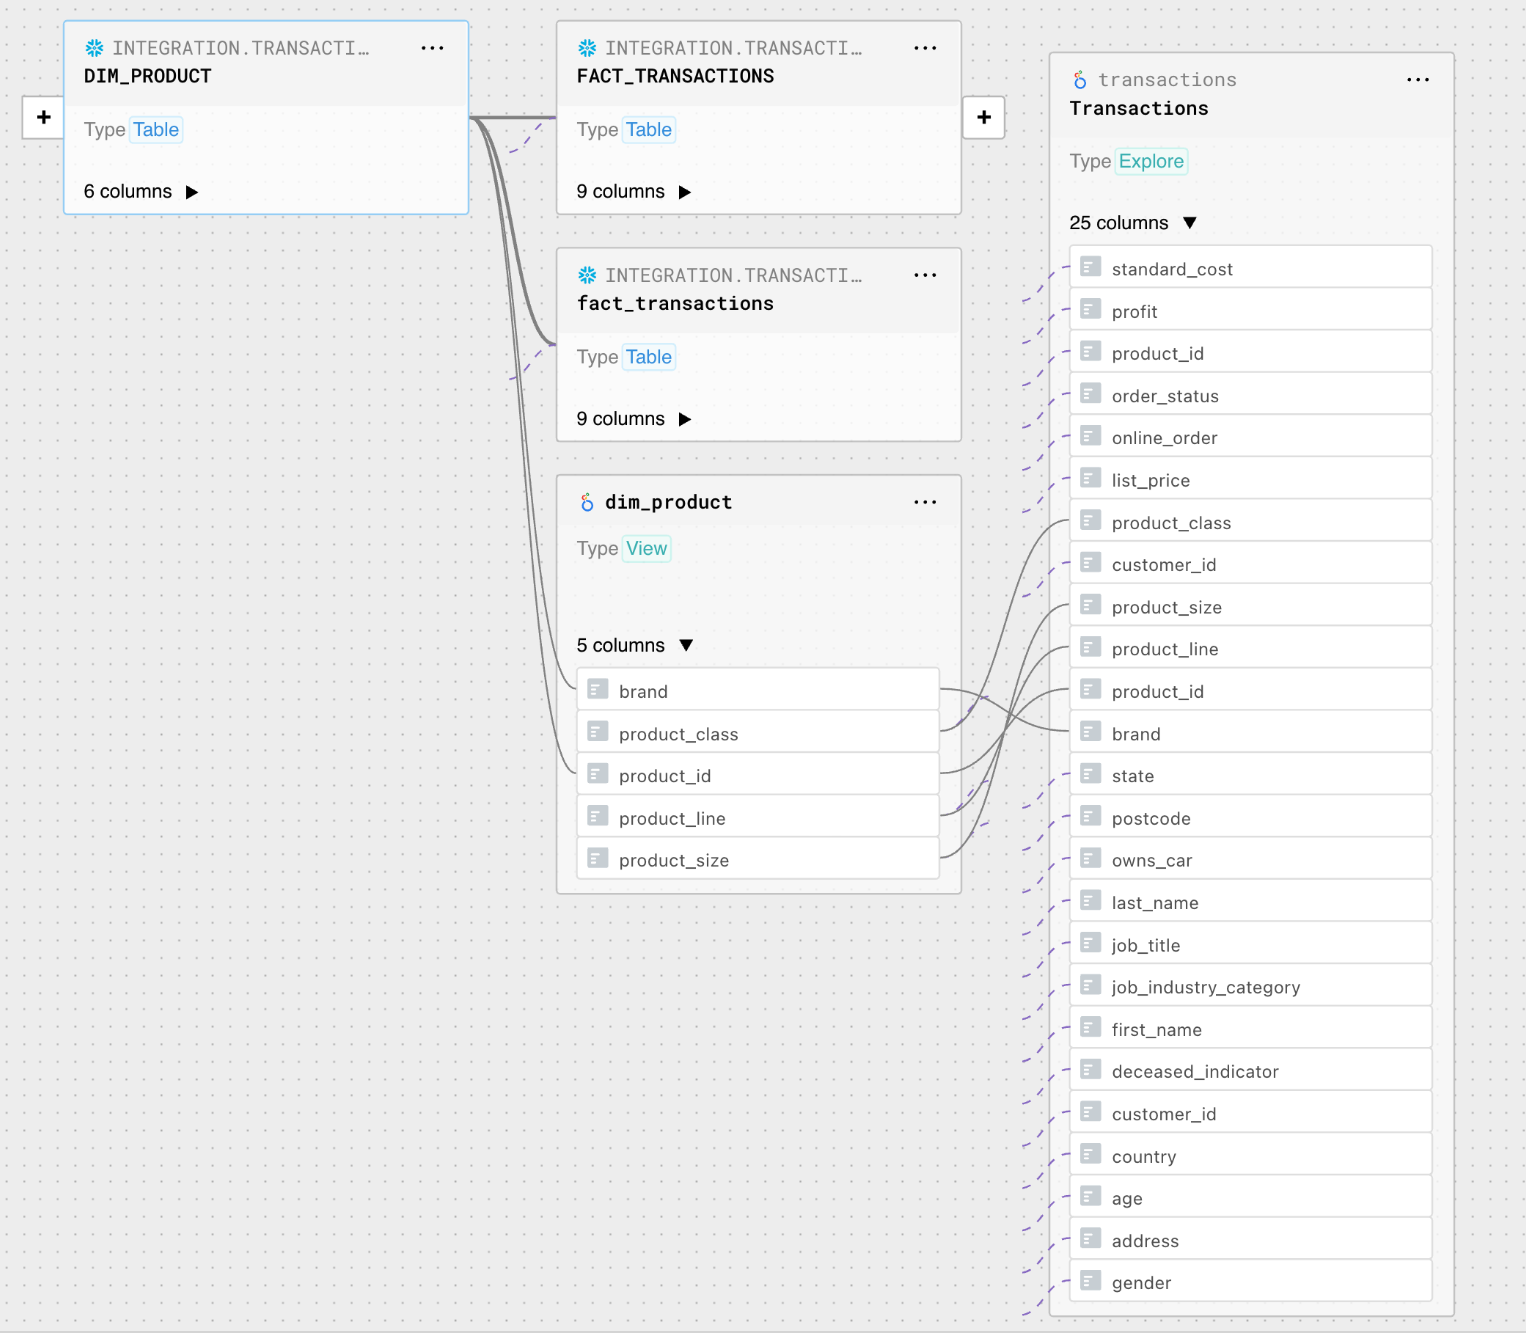
Column-level lineage can help with prioritising which data assets to first migrate from Redshift, and their corresponding data consumption points to transfer from (e.g. BI tools and dashboards). This often proves critical to minimizing disruption to data accessibility.
Connect to Redshift with Python
The next step in any migration away from Redshift is setting up a connection so that you can automate the pulling of the DDL for tables in Redshift. One of the simplest ways to do this is with Python and a well-known package called psycopg2, which is used extensively for Postgres.
$ pip3 install psycopg2
With connection information configured for the Redshift cluster, obtaining a connection using Python and psycopg2 is straightforward.
`import psycopg2
def connect_to_redshift(): try: conn = psycopg2.connect( dbname=‘migration_test’, host=‘my-redshift-instance.us-west-2.redshift.amazonaws.com’, port=5439, user=f’{user}’, password=f’{password}’) return conn except Exception as err: print(err) exit(1) `
With a connection to Redshift established, the next step is to pull the DDL for the table(s) that need to be migrated and created inside Snowflake. There are, of course, some slight differences in syntax for items like timestamps between the two systems, and these will need to be modified for use in Snowflake.
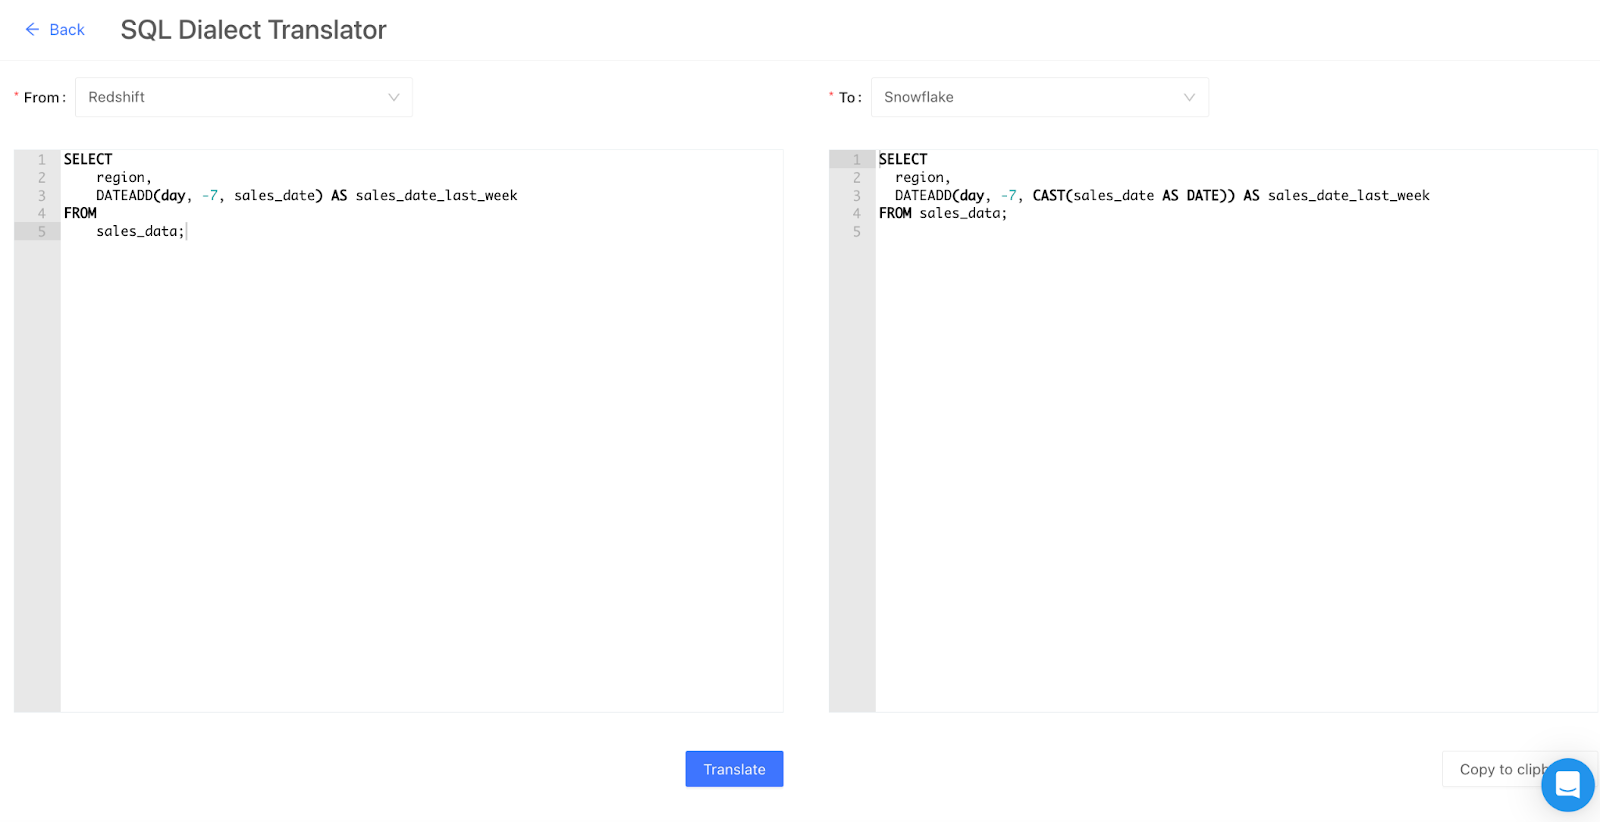
Automate SQL translation
Finding an automated way to translate SQL dialects from a legacy database to modern ones enables teams to expedite and streamline the migration of substantial code repositories.
This approach also safeguards the retention of the business logic embedded within the original SQL code. Employing a SQL translator to facilitate the code migration consequently diminishes the usual time and resources allocated to manual rewrites while concurrently minimizing the occurrence of errors.
Datafold’s integrated SQL Dialect Translator streamlines and automates the SQL conversion procedure.
 As an example of how this benefits database migration, let’s consider the migration of a sample table, sales_reports, from Snowflake to Redshift. The following DDL statements illustrate the similarity between the two, with a slight variation where Redshift uses DECIMAL and Snowflake employs NUMBER for a specific data type. This showcases how automated SQL translation tools simplify the migration process and maintain consistency across different database platforms.
Snowflake DDL:
CREATE TABLE IF NOT EXISTS sales_reports ( id INT, report_date DATE, sales_rep_id BIGINT, sales_amount NUMBER(6,2) );
Redshift DDL:
CREATE TABLE IF NOT EXISTS sales_reports ( id INT, report_date DATE, sales_rep_id BIGINT, sales_amount DECIMAL(6,2) );
With a connection created to the Redshift cluster, a cursor can be created to query the information schema for the table(s) needed for the migration.
`cursor = conn.cursor()
cursor.execute(""" SELECT table_schema, table_name FROM information_schema.tables WHERE table_type=‘BASE TABLE’ AND table_name = ‘sales_reports’; """)
cursor.execute(sql) DDL = cursor.fetchall() cursor.close() `
With the DDL for the migration tables in hand, making any modifications needed and running the DDL create statements in Snowflake are straightforward tasks.
import snowflake.connector
`import snowflake.connector
con = snowflake.connector.connect(user=‘XXXX’, password=‘XXXX’, account=‘XXXX’) con.cursor().execute(””” CREATE TABLE IF NOT EXISTS sales_reports ( id INT, report_date DATE, sales_rep_id BIGINT, sales_amount NUMBER(6,2) ); ”””) `
Export data out of Redshift to S3
With our schemas created in Snowflake, we’re ready for the ingestion of data. The next step in the migration process is to export the data from each of the Redshift tables. This can be done easily with the UNLOAD command.
UNLOAD ('SELECT * FROM sales_report') TO 's3://migration-project/sales/unload/sales_report_'
The default format from the UNLOAD command is pipe-delimited text files. The FORMAT AS option can be used to specify other file types like Parquet, JSON, or CSV.
Two of the main file format options commonly used are CSV or Parquet. If the data size is small, around 6GB, the PARALLEL OFF option can be used to unload the data to a single file; otherwise, the UNLOAD command will create the same number of files as the number of slices on the Redshift cluster.
Import data into Snowflake
The importing of the S3 data from Redshift into Snowflake is a multistep process. First, we need to create a File Format Object in Snowflake, based on the previous files that were exported. In most instances, this will already exist in Snowflake. If CSV files were created, the new File Format Object would indicate CSV delimiter options.
CREATE or REPLACE file format migration_csv_format type = 'CSV' field_delimiter = '|' skip_header = 1;
The next step is to create a Named Stage Object that references the location of the Redshift migration files in their S3 bucket.
CREATE or REPLACE stage migration_csv_stage file_format = migration_csv_format url = 's3://migration-project/sales/unload/';
Lastly, we can run a COPY INTO statement to push our files from the S3 bucket into each Snowflake table.
COPY INTO sales_reports from @migration_csv_stage/sales/unload/ pattern='.*sales_report_*.csv' on_error = 'skip_file';
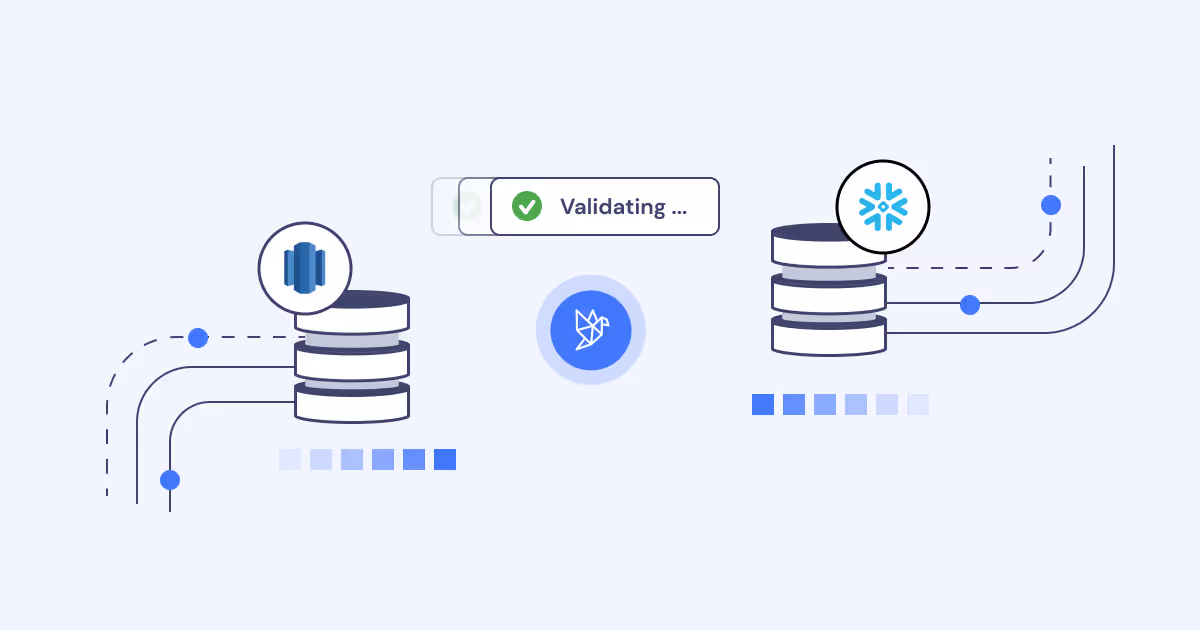
Validate and verify with data diff
With our data successfully migrated from Redshift and into Snowflake, we come to the most important part of any migration process: validating and verifying that all the data has been pulled and that it has been moved correctly.
Two of the most common questions and problems related to cross-database data migrations are:
- Is the data between the two systems the same?
- If there are differences, exactly which rows are different? **Data validation is the most time consuming and challenging part of a migration project, typically done by a large team manually writing many different SQL commands to verify data and counts. **When carrying out a large migration, missing even a single row can lead to inaccurate downstream results and mistrust in the migration process and new platform.
These question are hard to answer as existing tools are often inadequate. Datafold Cloud’s cross-database data diffing ensures data quality and parity between legacy and new systems, expediting the validation process and securing stakeholder approval for the migration. Having an automated validation tool can potentially save hundreds of engineering hours.

Conclusion
More and more organizations are adopting Snowflake, and many of them are coming from data stacks dependent on Redshift. Although the steps for migrating data from Redshift to Snowflake are clear and simple, the main challenge is the data validation and verification that is necessary to confirm a successful migration. In the past, comprehensive data validation required an immense amount of engineering resources and time.
Now, with Datafold Cloud, post-migration data validation can be automated, yielding high-quality results in a fraction of the time. The ability to use a single tool to compare any number of tables during a complex migration saves engineering time and effort and reduces the possibility of missing or incorrect data validations.
If you’re currently undergoing a migration, talk to our data migrations expert and tell us about your migration, tech stack, scale, and concerns. We’re here to help you understand if data diffing is a solution to your migration concerns.
Or, if you’re ready to start playing with cross-database diffing today, we have a free trial experience of Datafold Cloud, so you can start connecting your databases as soon as today.