Slim CI: The Cost-Effective Solution for Successful Deployments in dbt Cloud
This blog outlines how to setup a dbt Cloud PR Job in CI, which enables building dbt models and running dbt tests whenever you push commits to your GitHub (or GitLab) Pull (or Merge) Request.
.avif)
If you’re a dbt Cloud customer, you may have heard of using dbt Cloud in CI, or something called Slim CI. Running dbt Cloud in CI will help you catch any problems that would cause your production runs to fail, and running Slim CI will save you time and money (2023 vibes).
Using these techniques and grokking the documentation can be a little intimidating at first, and it does require some up-front investment, but there are important benefits:
- By running a dbt Cloud PR Job in CI, you can ensure that all your dbt models will build successfully, and dbt tests will pass, in your next production run. If there are any issues that would lead to failures, they would appear in your GitHub (or GitLab) Pull (or Merge) Request.
- By using Slim CI, you can avoid building extraneous models by only building and testing dbt models that are either:
(a) Edited in your Pull/Merge Request; or
(b) Downstream of models that are edited in your Pull/Merge request.
I’m confident that once you’ve set up Slim CI, you won’t want to go back to the before times.
Prerequisites
This guide assumes that you have a production dbt Cloud job that builds or updates your dbt models in the warehouse on a schedule.
Set up a dbt Cloud PR Job in CI
A dbt Cloud PR Job in CI will build dbt models and run dbt tests whenever you push commits to your GitHub (or GitLab) Pull (or Merge) Request.
Go to Deploy > Jobs.
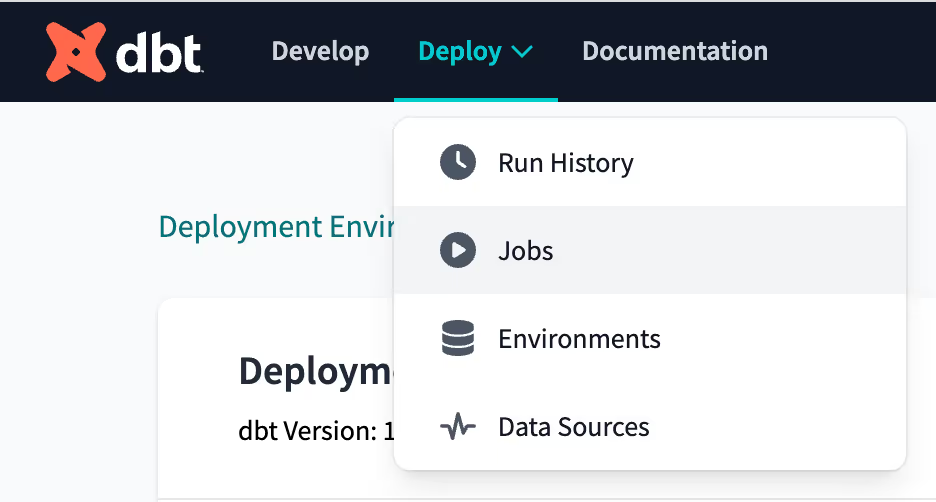
Click “+Create Job” on the top right.

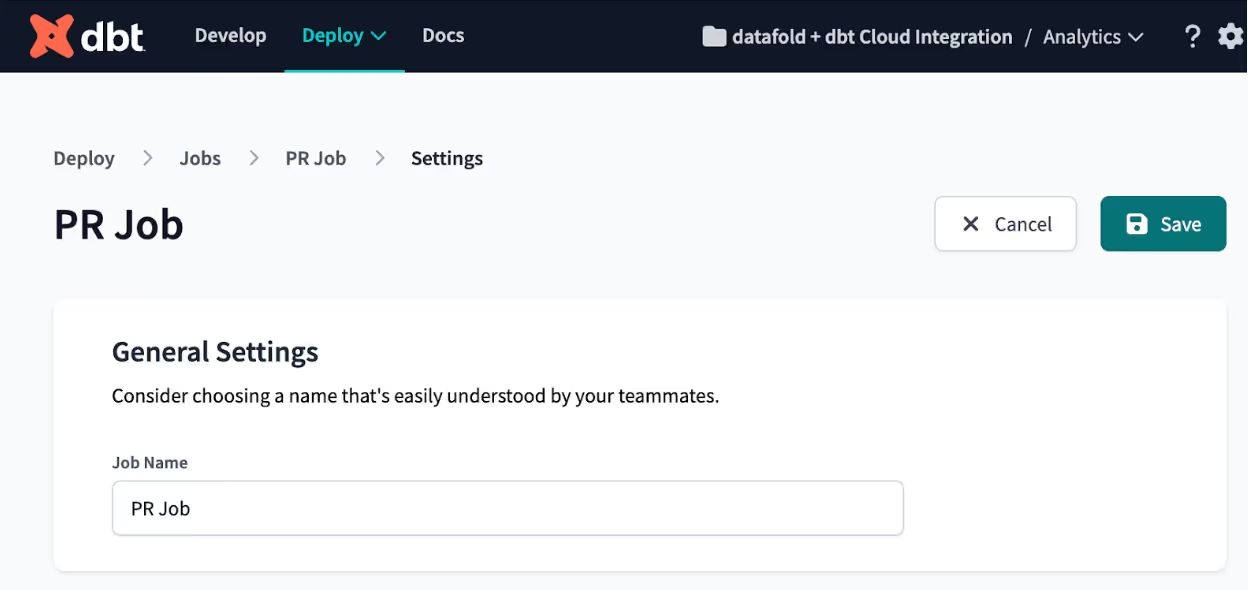
I suggest naming your PR Job something self-explanatory like “PR Job.”
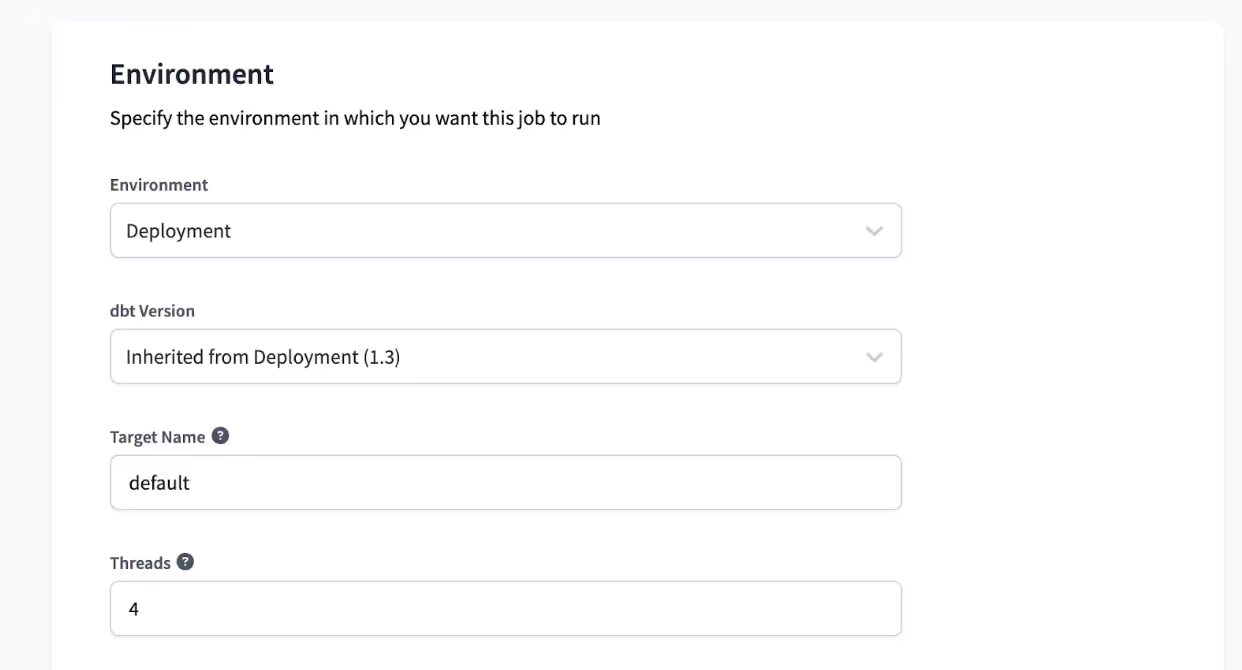
The next settings (Environment, dbt Version, Threads, Environment Variables, and Run Timeout) should match those of your Production job. Your Target Name should be set to ‘default’, which enables dbt Cloud to create a dedicated section of your cloud data warehouse for your PR data.
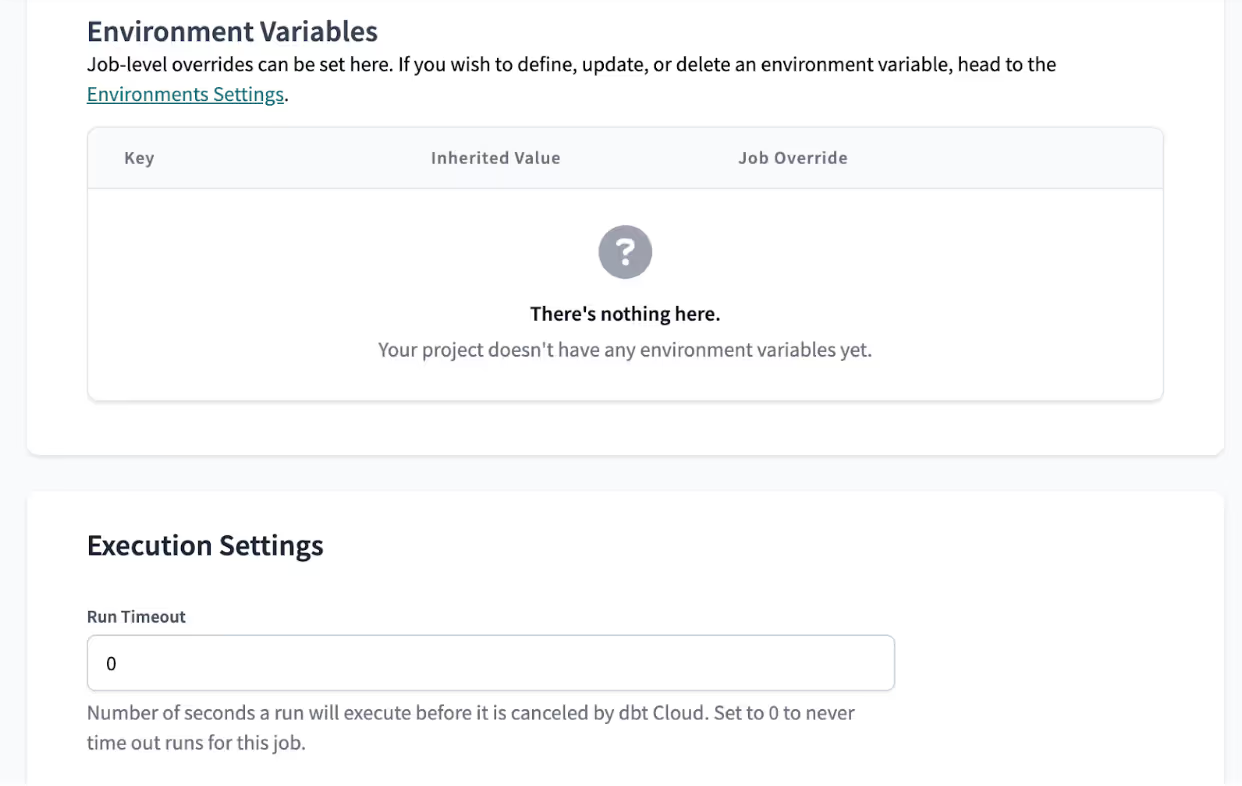
Select “No, do not defer to another run” from the “Defer to a previous run state” dropdown. We’ll come back to this setting and what it means when discussing Slim CI (which, remember, will save you time and money).

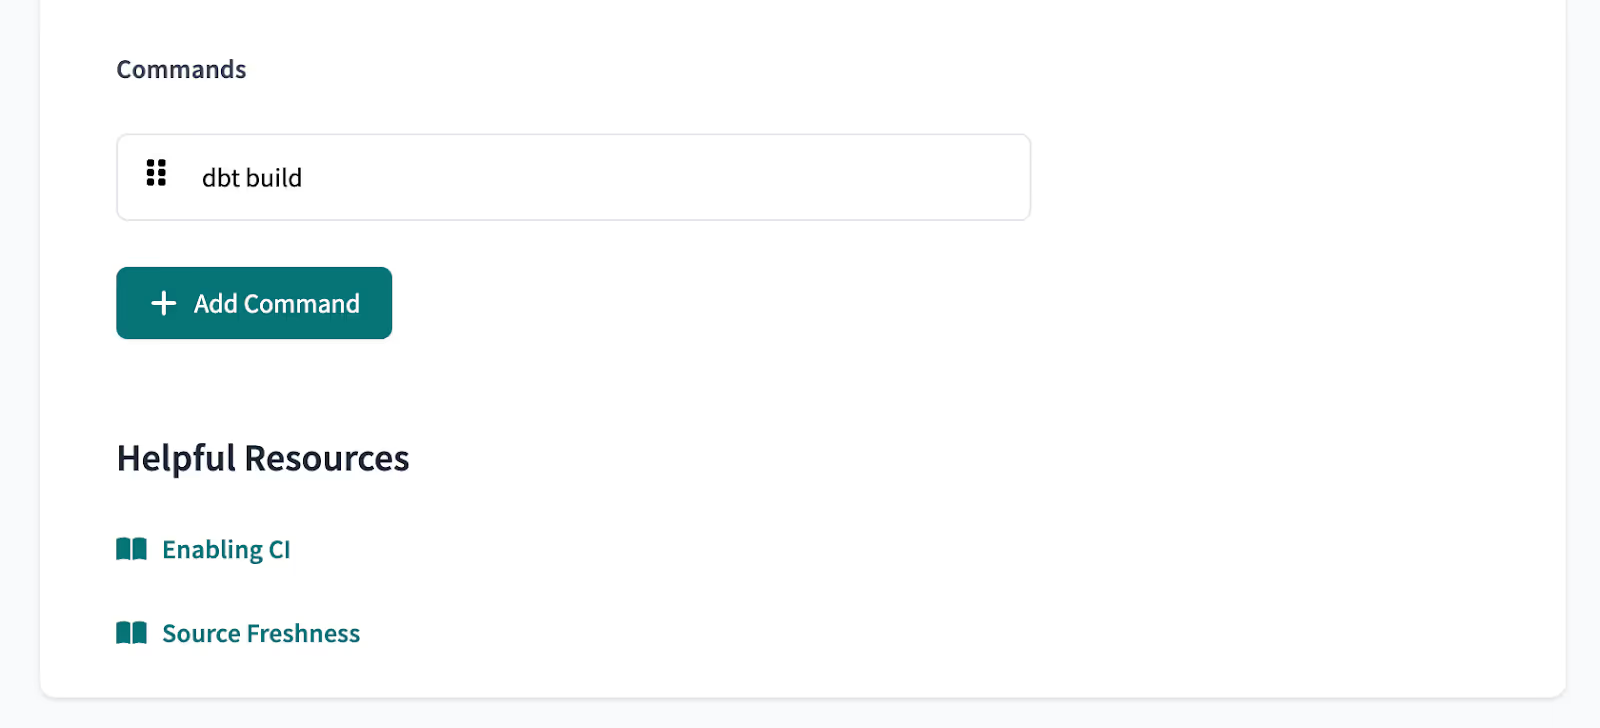
Then, add a command that will be executed when your PR Job is triggered. I suggest starting with `dbt build`, which builds your entire dbt project and runs all dbt tests.
Finally, tell dbt when to trigger this job by selecting “Run on Pull Requests.”
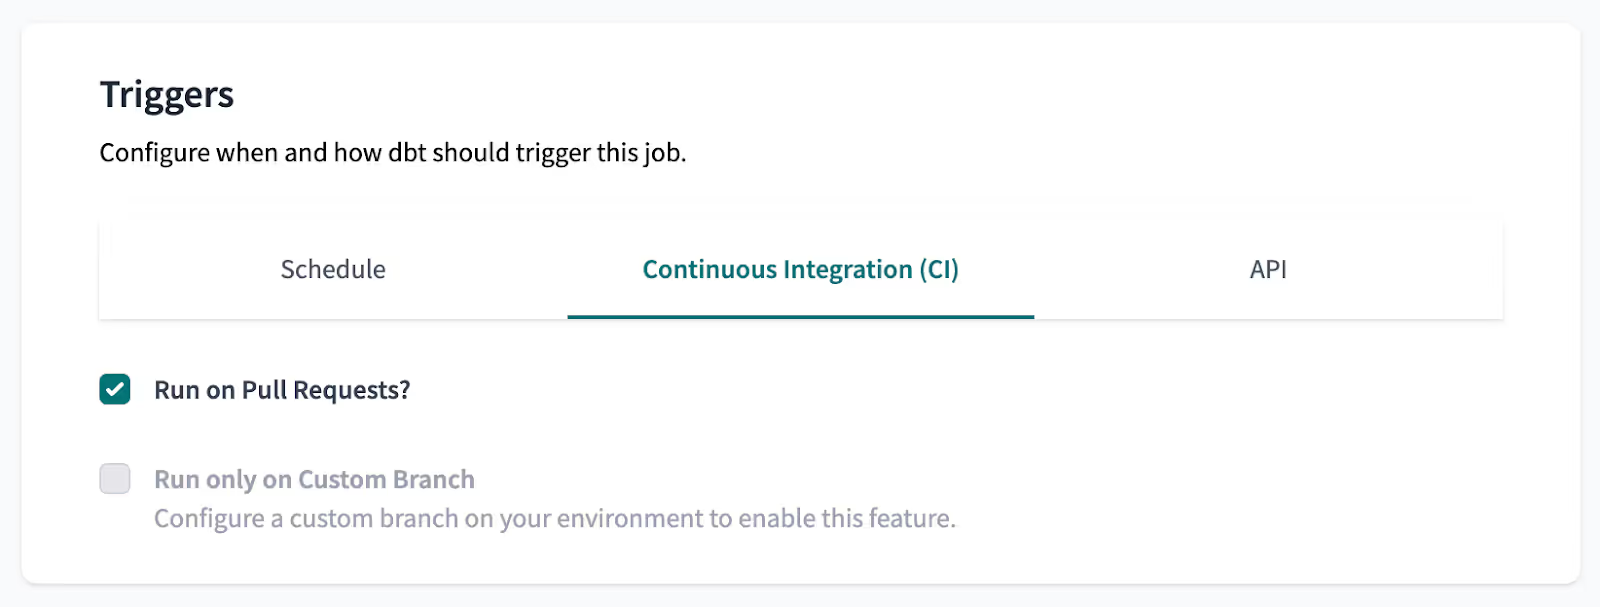
Now, whenever you push commits to a PR in your dbt project’s repo, the command you added to the PR Job (`dbt build`) will be executed using the code in the latest commit of the PR branch.
The actual data created by your dbt Cloud PR Job in CI will be written to a dedicated section of your cloud data warehouse. Writing data to your warehouse as part of the PR Job is beneficial for two reasons:
- It ensures that the current version of the code actually works, and can build models.
- It allows you to query and investigate the PR version of the data.
However, building (and rebuilding) your entire project in your cloud data warehouse every time you push commits to your PR can be expensive and time-consuming.
Set up Slim CI to build only what’s needed
Let’s return to a setting that I didn’t really explain in the previous section: the “Defer to a previous run state” dropdown. This setting is fundamental to building only the necessary models, which is a defining characteristic of Slim CI.
I guided you to select “No, do not defer to another run” when setting up a basic PR job. Now, go back to the PR job that you just created, click “Edit” on the top right, and select your production dbt Cloud job as the “Defer to a previous run state.”

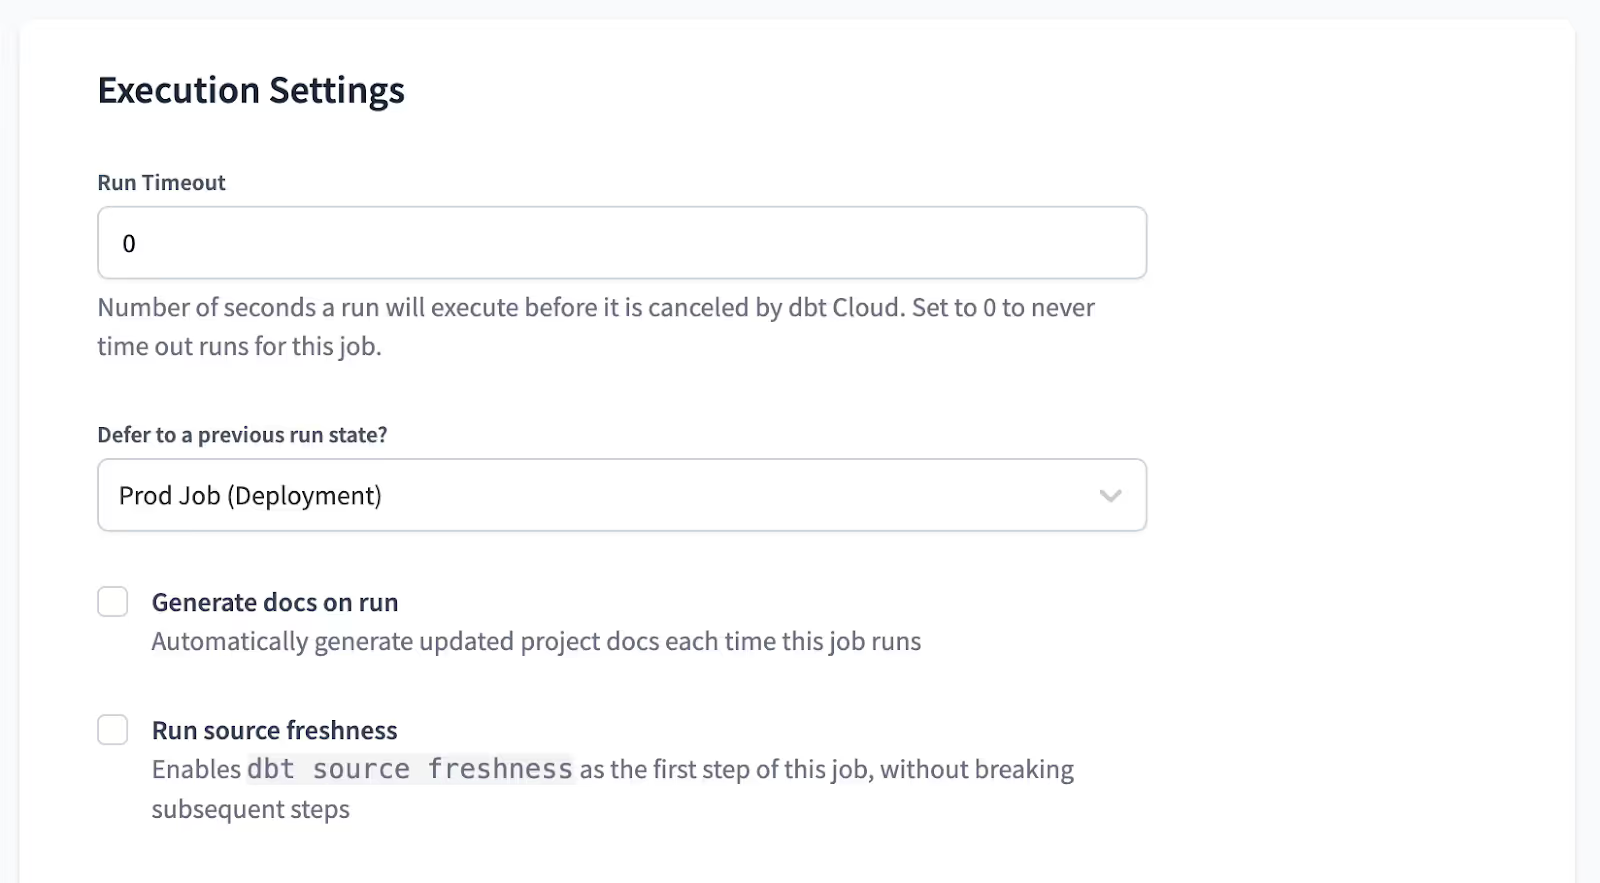
By making this selection, you are telling dbt where to find data that was not built in your PR job. (This will make more sense with an example–I’m almost there.)
I also guided you to add the command `dbt build`. This builds your entire dbt project. Replace that command with `dbt build --select state:modified+`. This will build only the modified models and any models downstream of modified models.

Think of it this way. Let’s say you only modified two models: `user_created` and `dim_orgs`, in the PR; and all the other dbt project code matches the code that was run in the most recent production job.
Notice that `user_created` is upstream of `dim_orgs`. We’ll come back to that!
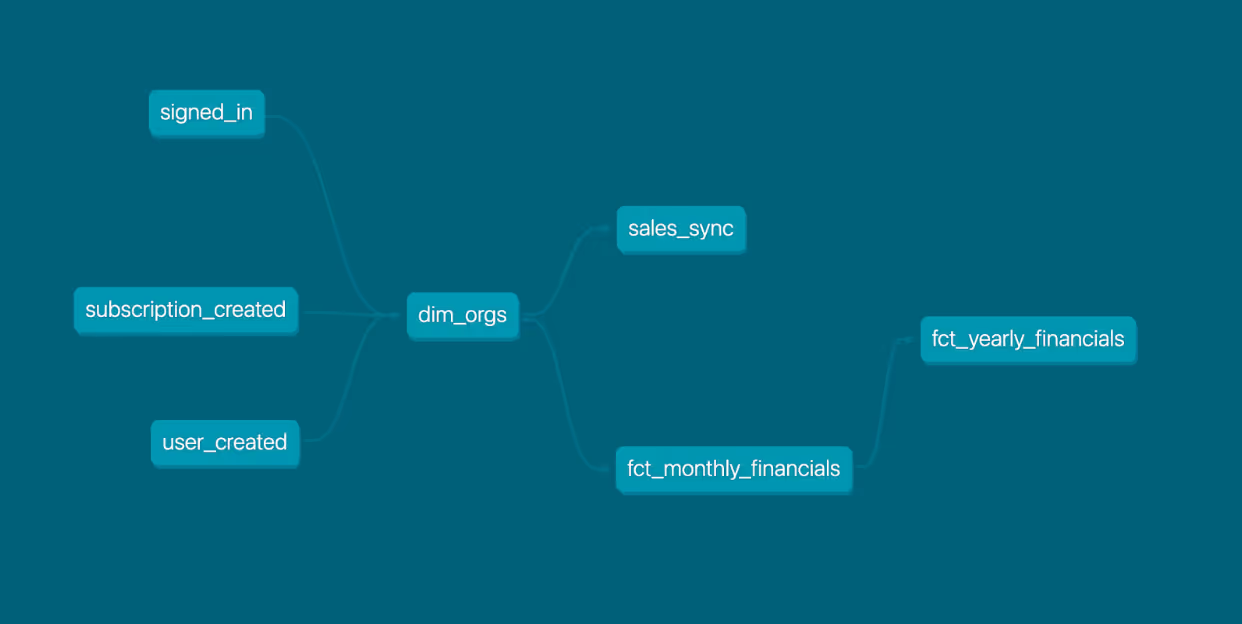
The command you just added to your PR Job (`dbt build --select state:modified+`) will build …
- The models you edited: `dim_orgs` and `user_created`
- The downstream models: `sales_sync`, `fct_monthly_financials`, and `fct_yearly_financials`
… in a dedicated PR section of your cloud data warehouse.
There’s no reason to build any models upstream of the edited models because they couldn’t possibly be impacted by your code changes.
Slim CI uses data from a previous job instead of building your entire project
If two of the three `dim_orgs` upstreams don’t exist in the dedicated PR section of your cloud data warehouse, how is `dim_orgs` built? It definitely doesn’t arise from spontaneous generation.

This is where the “Defer to a previous run state” setting comes in. The `from` statements in the query that builds `dim_orgs` actually refer to versions of the upstream tables that already exist in your production data if they weren’t created by the Slim CI job.
Let’s compare the basic dbt Cloud CI job that we started with to our Slim CI job to understand what’s going on.
With the basic dbt Cloud CI job, we used a `dbt build` command and set “Defer to a previous run state” to “No, do not defer to another run”. Accordingly, the compiled `dim_orgs.sql` code (the SQL that actually gets executed in the cloud data warehouse) for the basic dbt Cloud CI job might look like this:
The `from` statements query upstream tables that exist in a schema called `PR_NUM_123`. `PR_NUM_123` is automatically generated by dbt Cloud to store all the data for this particular PR. All the tables in the entire dbt project exist in this schema. They represent the state of the project in the latest commit of the PR branch.
In contrast, the compiled `dim_orgs.sql` code for our Slim CI job would look like this:
Here’s a `git diff` to make it easy to see what’s changed, with the Slim CI code on the right:
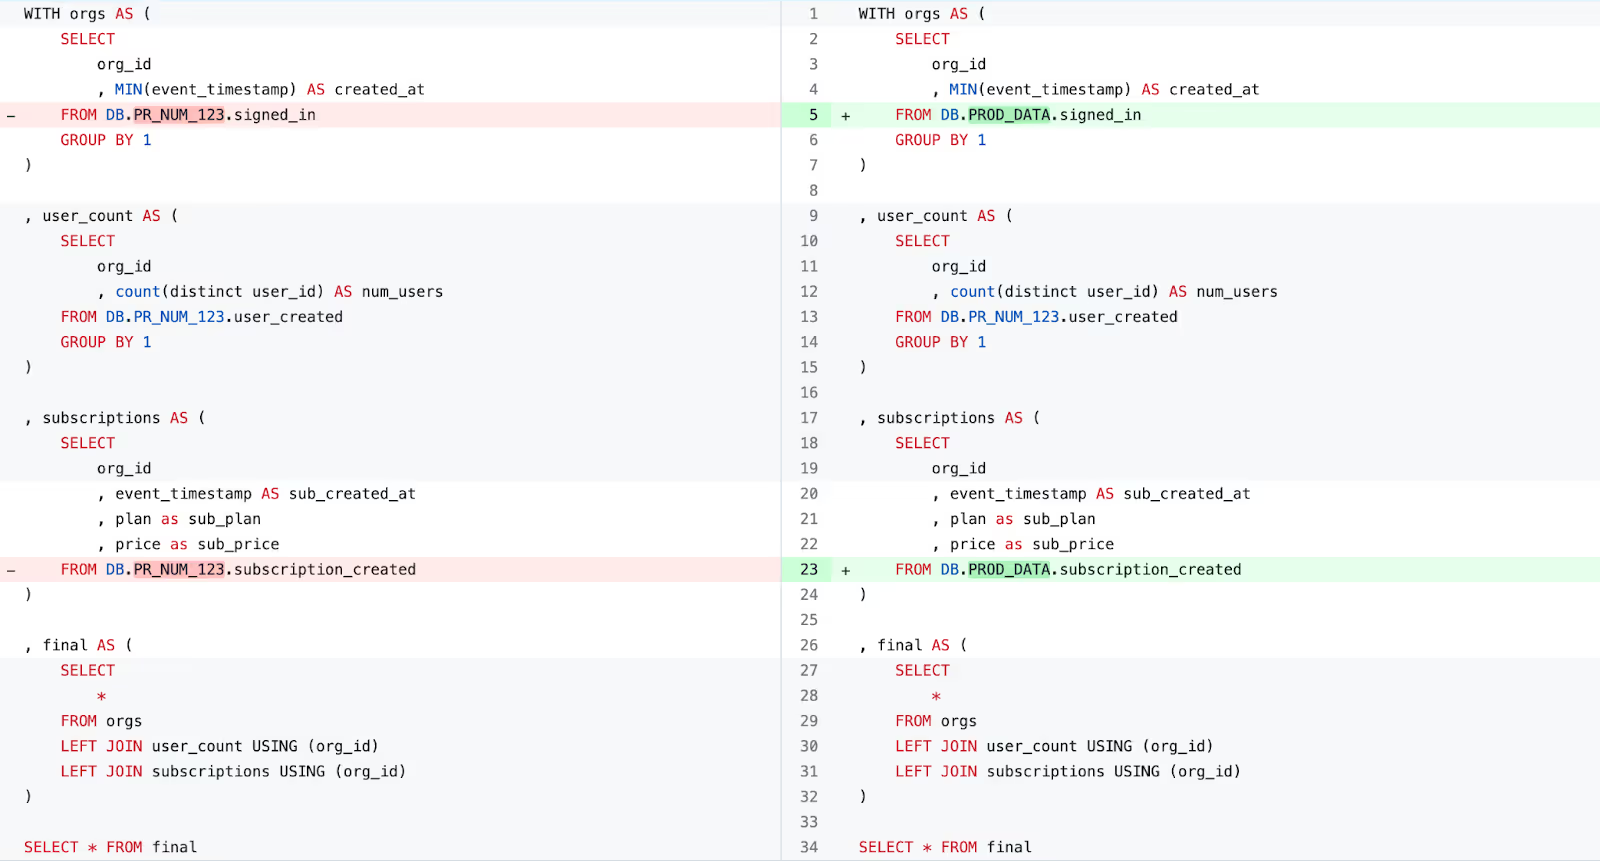
Notice how in the Slim CI compiled code, if there’s an upstream model that’s not built as part of the Slim CI job, the SQL will query data from the job you selected in the “Defer to a previous run state” dropdown.
That’s why in the Slim CI compiled code, you can see:
- `DB.PROD_DATA.signed_in` (built in the most recent Prod Job)
- `DB.PR_NUM_123.user_created` (built in the PR Job)
- `DB.PROD_DATA.subscription_created` (built in the most recent Prod Job)
Personally, I think this is pretty cool.
One level deeper – how does this all work?
All of this depends on the comparison of two `manifest.json` files, each representing different states of the dbt project:
- One `manifest.json` file represents the state of the project from the last run of the job selected in the “Defer to a previous run state” dropdown.
- One `manifest.json` file represents the state of the project from the current run of the Slim CI job.
The `manifest.json` is a big, static, structured file containing information on the exact state of your dbt project, including upstream and downstream dependencies. It is generated whenever you run `dbt build` (or `dbt compile`).
Here is a very small section of a `manifest.json` to give you a sense for how dbt stores information representing the state of your project:
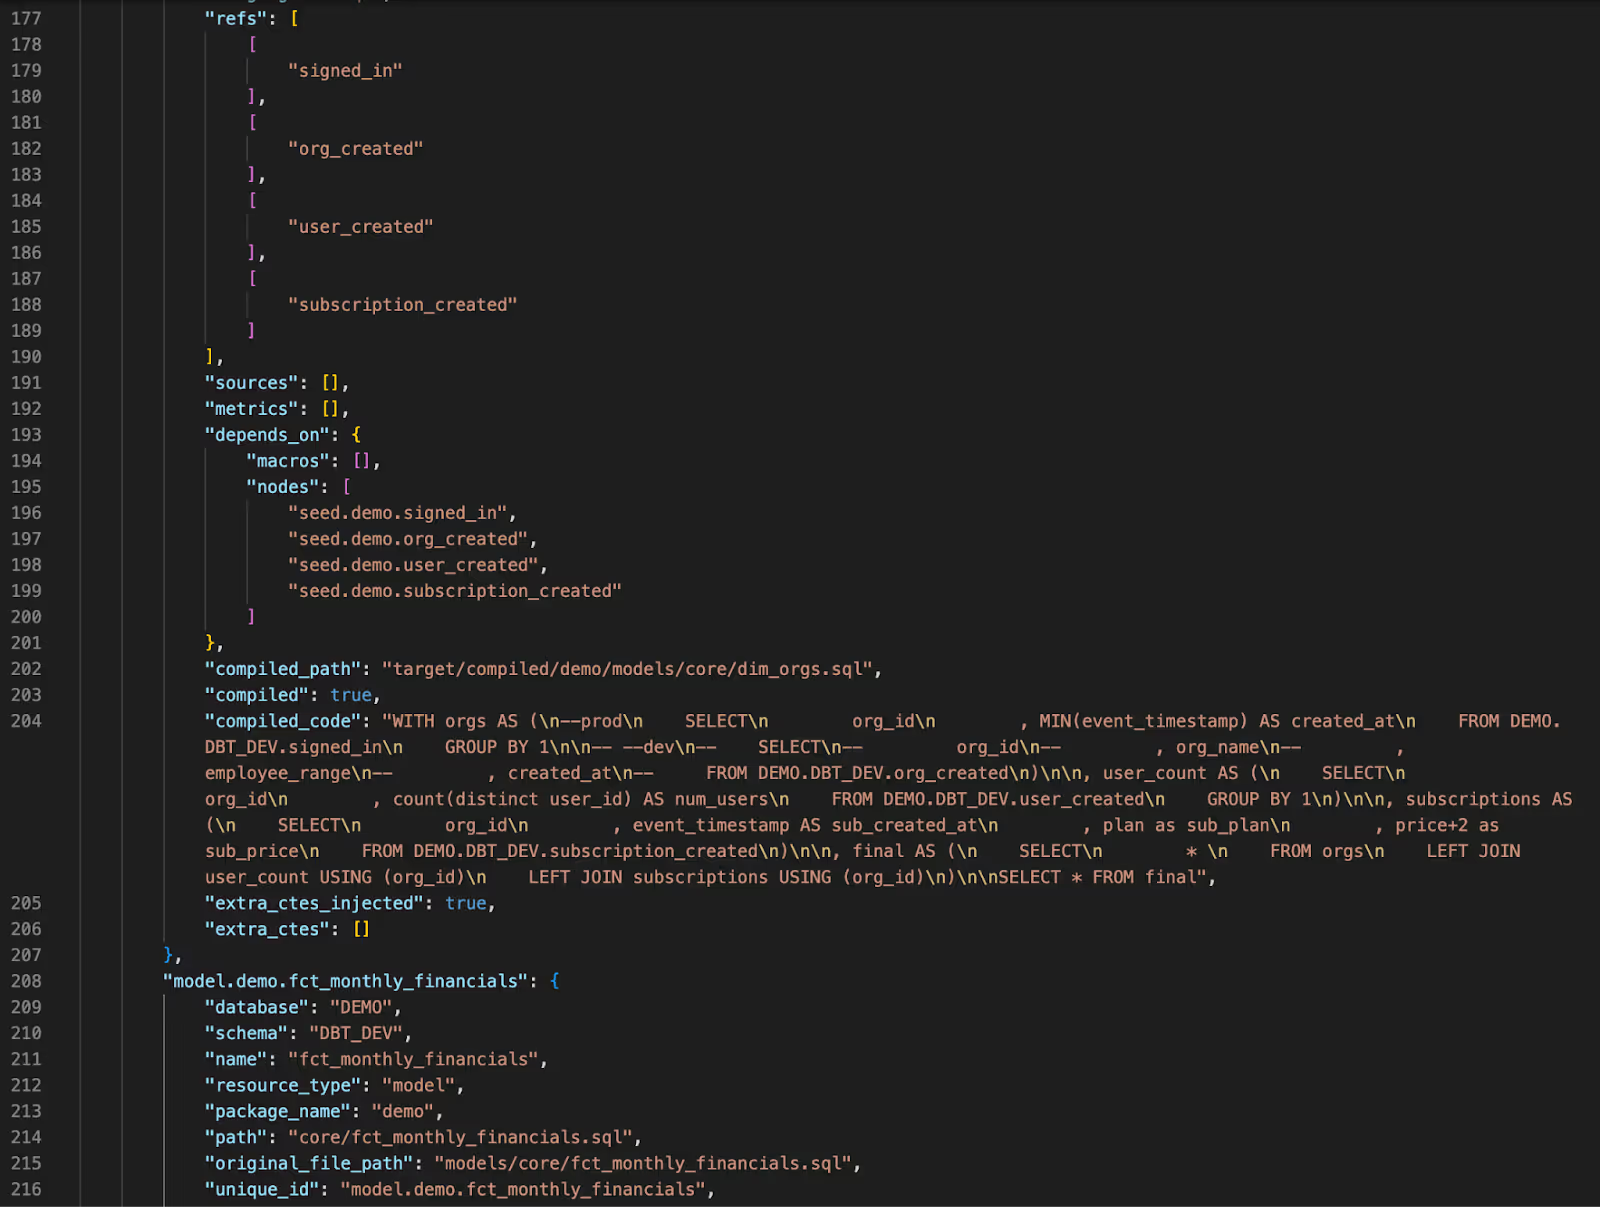
The important thing to understand is that dbt has a way of identifying differences between different versions of your dbt project by comparing versions of this file. This is how `dbt build --select state:modified+` knows what to build.
These are building blocks that you can adapt to your organizational context.
In this guide, we are assuming you have only one production job, and this is the job that your PR job defers to. Your reality might be more complex. You might have multiple dbt Cloud Jobs, or multiple environments such as Staging or QA.
With this in mind, consider that you can pick any arbitrary job to defer to, and dbt will use that job’s `manifest.json` to figure out what to diff based on `dbt build –select state:modified+` (or a similar command). All the principles above will still apply, but you might have reason to adjust your `build` command, or select a different job to defer to.
dbt Labs has provided documentation on how to design around some of these more complex cases. You can get pretty creative. It’s like a puzzle!
dbt Cloud Slim CI can save you a lot of time, money, and headaches
We are all thinking about managing cloud costs and operating efficiently. By leveraging not only basic dbt Cloud CI, but Slim CI, you can get more value out of dbt Cloud while imposing important limitations on cloud data warehouse activity so that you can `dbt build` exactly what you need to and prevent breaking changes to your dbt project.

.avif)

