
Taking your dbt CI pipeline to the next level


In my last article, we laid important groundwork for getting a basic CI pipeline for your dbt Core project up and running. Because CI can get complicated fast, we kept things small. Our super simple CI workflow with only 43 lines of code installed Python and dbt; compiled, built, and tested dbt models; and ran a SQL linter against any new code in new pull requests.
Now that we have a solid foundation in the basics, it’s time to be a bit more ambitious and add four advanced integrations. I’ll first take you through Slim CI: you don’t want to build every single model each time, Slim CI can help you build and test only models that have been modified in your pull request and are downstream of it.
Then, I’ll show you how hooks can help automate tasks after each PR, how Data Diffs can help you track changes more effectively, and how Slack notifications can keep your team in the loop in real-time.
Why this specific combination of features? The four will set your CI pipeline apart in making it more efficient, error-resistant, and collaborative. As teams grow, you’ll need greater data governance, and having these integrations in place today will ensure that your data processes remain robust and scalable tomorrow.
In fact, we use these at Datafold across our repos, whether for our virtual hands-on labs or for our own internal analytics work.
Fork our repo to follow along, or check out the Loom for a guided walkthrough!
Build and test only what you need: Slim CI
If you have a project with 10 models, it’s trivial to rebuild them all each time whenever the CI pipeline is triggered with a new PR. But when your data team scales and the number of models being added or modified start to increase, running a full dbt build starts to get expensive (and takes a long time).
In fact, mature data teams should never run all their dbt models; implementing Slim CI should be table stakes as a team scales.
Slim CI is a framework for figuring out building and testing only the models directly impacted by changes introduced in the PR; we’ve previously shared how to implement it with dbt Cloud. To implement it, you’ll need what’s called a manifest.json file. If you’ve never done this before, you might be wondering: what is a manifest? Let’s take a closer look.

A manifest is a map for your project 🗺️
A manifest in data engineering is a detailed list or record of everything your data project includes and how it's organized. It's kind of like a map that shows you where everything is and how it's connected.
When you run a process like dbt build to transform your data, it creates lots of pieces of information about what it did. This could include things like what data tables were created, what changes were made to existing tables, and how long the process took to run.
All of this information is important because it helps you keep track of your data project and understand what's happening with your data. For example, if you want to know which parts of your data have changed since the last time you ran a process, you can compare the current manifest with an older one to see what's different.
How Slim CI works
Now that it’s clear why a manifest.json file is critical to Slim CI, let’s go over a high-level overview of what the Slim CI logic does for you before we jump into some code.
In dbt Core, these steps must happen:
- Upload your dbt’s production-version of the manifest.json file to a cloud storage like S3 or Google Cloud.
- Each time you run dbt in your PR (e.g. dbt build), you’ll pull down that production manifest.json file from your cloud storage to know which dbt models were just modified.
- After completing the production dbt run (which has incorporated new changes), a new version of your manifest.json file is generated. This brings us back to step 1: Upload the latest version to your cloud storage.
Add an extra step to our yaml file
For the simplicity of this tutorial, we’re going to assume your production-level manifest.json has already been uploaded to an S3 bucket/cloud storage. (If you need help setting this up, check out our 7-minute Loom on creating your S3 bucket for Slim CI.)
Now, we’ll have to modify our dbt-pr-ci-job.yml job, which we’ve renamed as dbt-pr-ci-job-staging.yml. We need to add an extra step to our CI workflow to retrieve the manifest.json file from our S3 bucket and modify our existing dbt build step.
Note that the SNOWFLAKE_SCHEMA has been changed to something that dynamically generates a Snowflake schema name by concatenating the string 'PR_NUM' with the pull request number. For example, if the pull request number is 123, the resulting schema name would be 'PR_NUM_123'.
Why would we want this? There’s a few reasons why this is best practice, but the main one is to isolate any changes introduced by that pull request from other development work. When we’re ready to push our changed code and/or data to production, we’ll run a staging-teardown.yml to remove this temporary schema altogether, so make sure to add the file, and the macro drop_pr_staging_schemas.sql to identify and drop the staging schemas associated with the pull request, to your repository.
Our dbt build command also looks a little different with new arguments:
Basically, this command tells dbt to optimize the build process by selecting only the modified models, deferring their materialization until later, and excluding models that materialize snapshots. Here’s a breakdown of what each argument does:
Now, you can run and test only modified models during your CI process, saving your team time and money!
Adding a deploy.yml to GitHub Actions
If we have a staging.yml, why do we need a deploy GitHub Actions workflow, dbt-pr-ci-job-deploy.yml? Having a staging.yml specifically for CI testing of changes in a staging environment and a corresponding deploy.yml for deploying those changes when merging to the main GitHub branch ensures clear separation of tasks.
As we discussed in the previous article, we want to push code changes to the staging environment first because it gives you the chance to “break the data” without breaking production and impacting business.
If this is starting to sound too complicated, don’t give up just yet. The good news is that both files are very similar. Take a look at the dbt-pr-ci-job-deploy.yml and dbt-pr-ci-job-staging.yml files and you’ll see that the differences are minor.
Automating deployment with dbt pre-commit hooks
What are hooks?
In data engineering, hooks are commands triggered automatically at specific points. They allow you to customize and extend the functionality of your data engineering workflows without having to modify the core functionality of the tools themselves or write your own extensive sequential code modules.
Within a dbt project, hooks are commonly used to perform additional actions before or after certain dbt commands like dbt build and dbt test. Hooks could include loading data into a database, sending notifications to team members, or executing custom SQL scripts. You can have pre-hooks or post-hooks, which are referring to when they run after a dbt command.
There are many types of hooks you could add to your project’s CI workflow. One underutilized best practice is to add pre-commit hooks – hooks that run before anything is committed to the main branch.
Many companies have incorporated hooks as part of their CI workflow. For example, FINN, a global car subscription service, has shared how they used pre-commit hooks to enforce compliance with company policies (e.g., presence of model owners, consistent naming conventions). This helped them break through a speed-quality frontier, where they did not have to sacrifice data quality for higher developer speed since checks were enforced automatically before merging to production code.
__
💡Pro-tip 💡
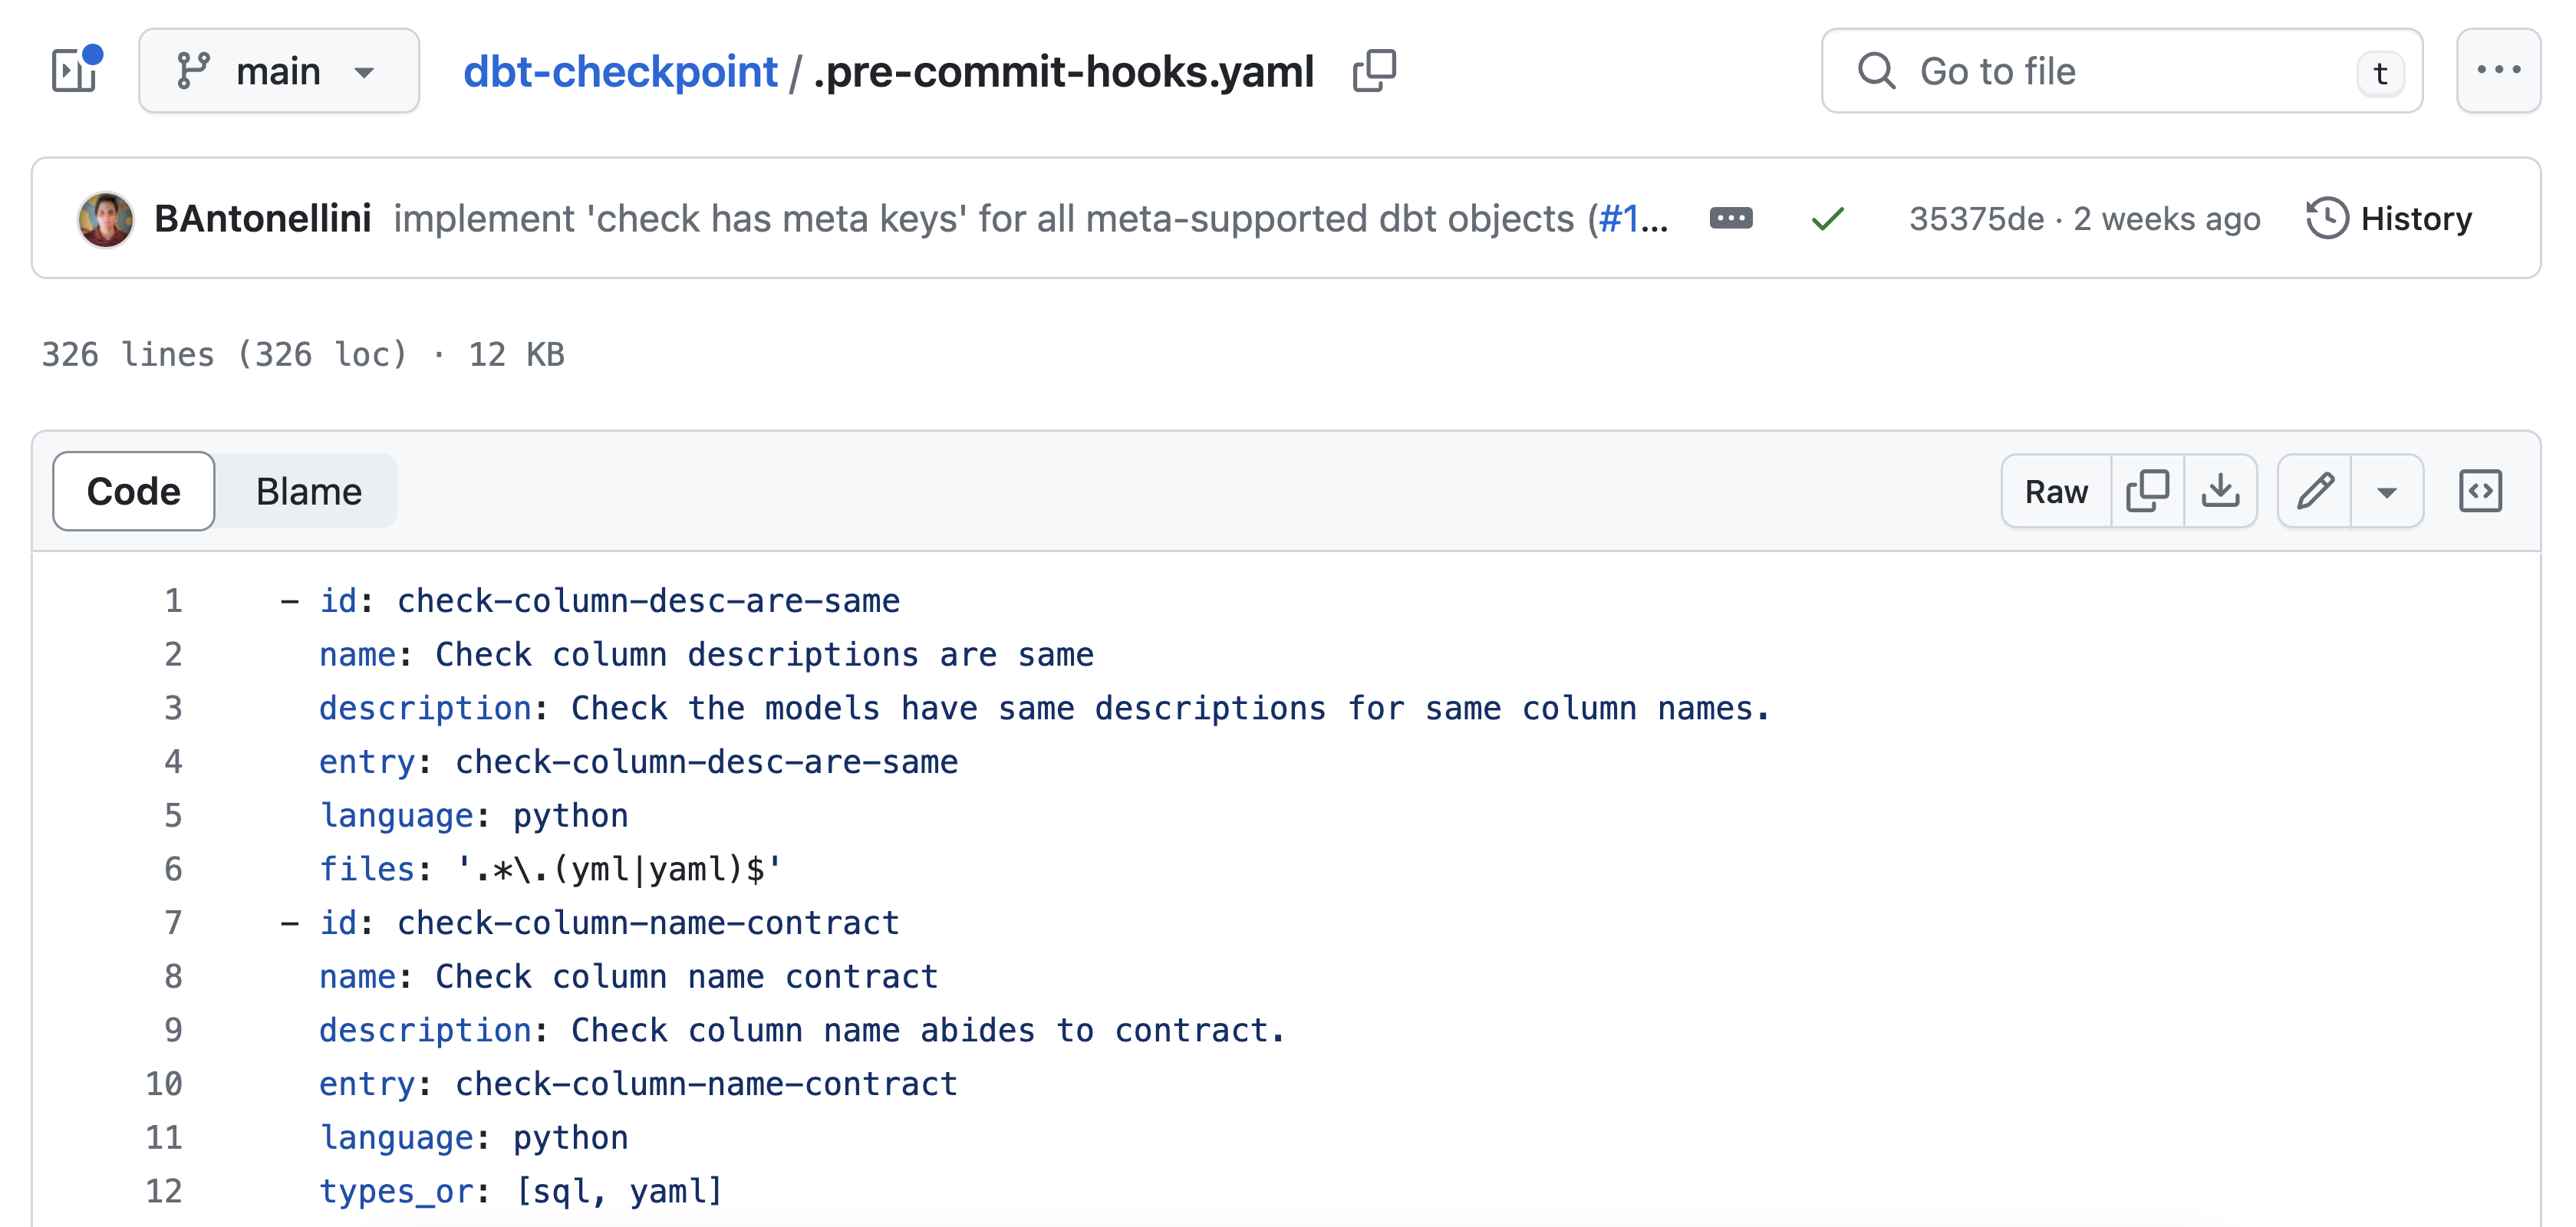
Did you know that dbt offers an open-source dbt-checkpoint package with their recommended pre-commit hooks? For example, their .pre-commit-hooks.yaml file includes tests for column descriptions, schemas, tags, and more.
__
Ok but I already have dbt tests
You might be wondering: if I’m already adding unique and not_null tests to my primary keys, why would I also need pre-commit hooks? The short answer is that it’s not good practice to assume that every developer on your team works the same way and remembers to enforce the same tests, documentation, or metadata practices. It’s also impractical to manually check every single line of code before it gets merged to main.
A better way is to enforce these tests by having it run automatically in your CI pipeline through each new pull request. This helps maintain code quality, consistency, and reliability within a codebase.
Set up the pre-commit hooks
To layer on pre-commit hooks onto our existing CI workflow, we’ll need to install pre-commit in our virtual environment:
Make sure to add pre-commit to the requirements.txt file so that it’ll be automatically installed when other developers on your team set up their dbt projects.
Then, create a .pre-commit-config.yaml file in the root of your dbt project. This file will list which hooks you want to run before each commit; you can decide how many hooks you want to include!
Where do you find these hooks? You can use pre-commit hooks from many sources that developers have made publicly available. We’ll use the hooks from dbt-checkpoint since those are created specifically to ensure that your dbt project adheres to best practices.
I’ll keep things simple with just three hooks from dbt-checkpoint:
- check-column-desc-are-same to ensure that models have the same descriptions for the same column names .
- check-model-columns-have-desc to verify that model columns have descriptions.
- dbt-compile to check for syntax errors.
We’ll add our hooks to the .pre-commit-config.yaml file:
Run it locally
Now that our hooks are set up, let’s configure the CI workflow. It’s considered best practice to use both:
- Local pre-commit hooks: Run on your local machine before you commit any changes. (Always nice to have peace of mind that your PR works before you actually open it up for review!)
- CI checks via GitHub Actions (or whatever your git/CI process looks like): Run in a CI workflow once changes are pushed to the repo in a pull request.
This two-level approach gives you immediate feedback on your commits, while also enforcing checks on the repository level to catch anything that might have been missed or bypassed locally.
Let’s first run it locally. In your terminal, run pre-commit install as it then ensures that the hooks will be automatically triggered to run whenever you git commit to your repository. Let’s test it out with pre-commit run --all-files which runs all the configured hooks against all the files in your repository. It's a good practice to run this command after setting up to ensure everything is configured correctly. Here’s what you should see:

From now on, every time you commit changes, the pre-commit hooks will automatically run and check your changes according to the configurations set in .pre-commit-config.yaml. If any hook fails, the commit will be blocked, and you'll need to fix the issues before proceeding.
Run it in GitHub Actions
Next, we'll add another GitHub Actions file configured to run our pre-commit checks, through a yaml file called pre_commit_checks.yml.
At this stage, pre_commit_checks.yml is the same as the first GitHub Actions file except it includes two additional lines of code to run the pre-commit checks:
Set up the CI workflow
We’ll have to make two more changes to our yaml file. First, we only want the pre-commit checks yaml file to run on pull requests that target the main branch. This helps maintain code quality by automatically running checks before merging changes into main through a pull request.
Then, we’ll move the environment variables up so it is defined at the job-level and thus available to the entire job, since we need the environment variables to be accessible during two steps, dbt build and pre-commit run --all-files. Here’s the entire pre_commit_checks.yml file:
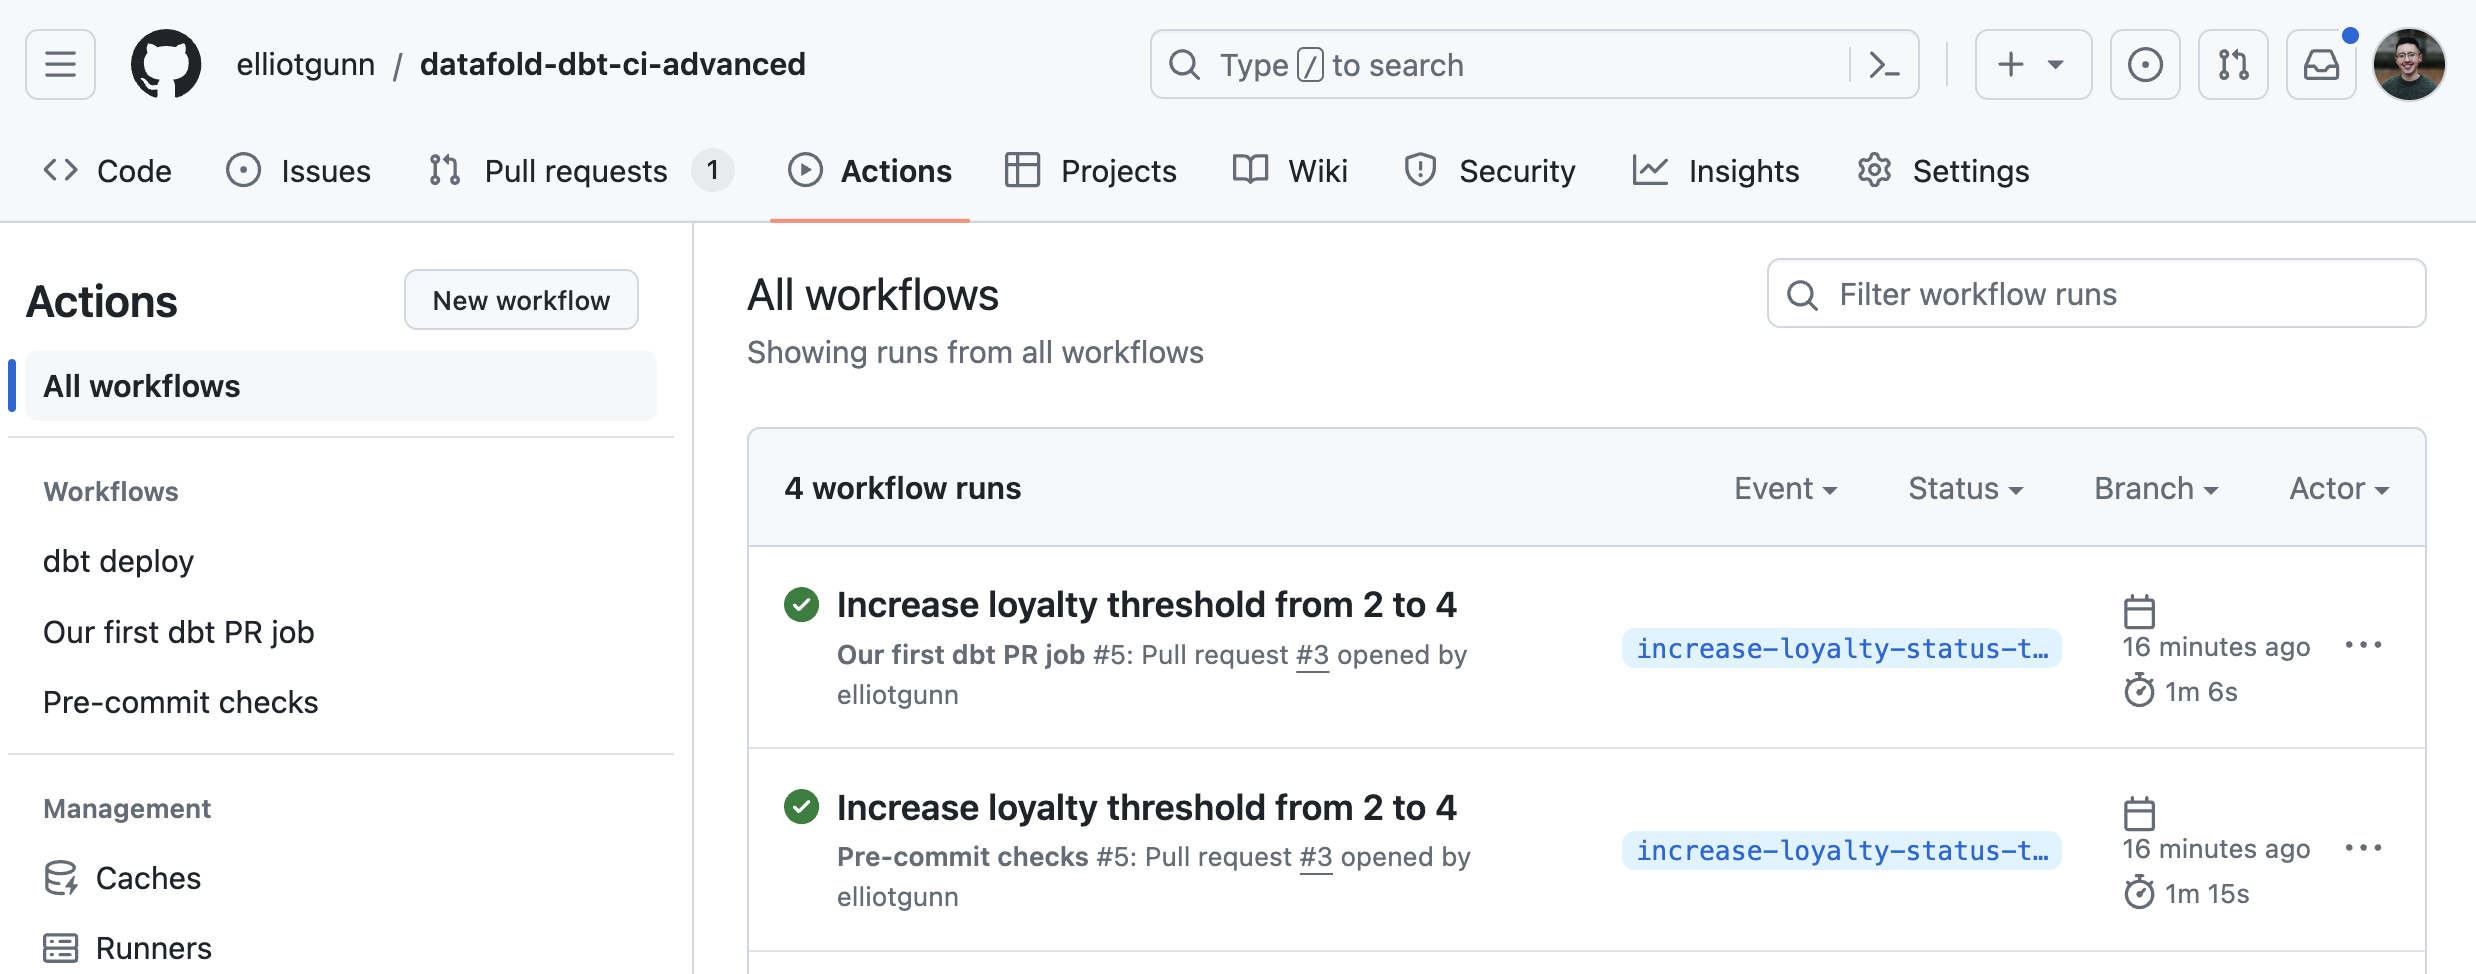
To test it out, create a pull request, which will trigger the pre-commit checks workflow automatically, in addition to our first workflow. After a few seconds or minutes, head to the GitHub Actions tab to check on the workflow’s status. This time, we’ll have two CI workflows:
Validate every data value with Data Diffs
Which is better: aggregate or value-level diffs?
In our next integration, we’ll look into how Datafold can help prevent untested or bad data from entering production and impacting business operations during your CI process.
It’s obvious why you would want to have data validation in your CI process: it’s a priority for data teams to maintain data integrity and avoid data regressions whenever models are added or modified in day-to-day data work.
Most data observation tools offer data validation only at a high level through aggregate metrics or naive test results. This is a problem because you can’t detect subtle changes in individual data values, which leads to overlooked errors or inaccuracies that could impact downstream analysis.
For example, suppose your company relies on sales data to determine pricing strategies, but your data quality tool only provides data validation only at a high level through aggregate metrics, such as the aggregated total sales revenue value or count of primary keys. If there's a problem with the data, such as incorrect pricing for a specific product, the aggregate metric might still appear accurate because it sums up all sales. As a result, your predictive analytics models or machine learning algorithms will make decisions based on flawed data, leading to issues like incorrect revenue forecasts, misallocated resources, or ineffective marketing strategies.
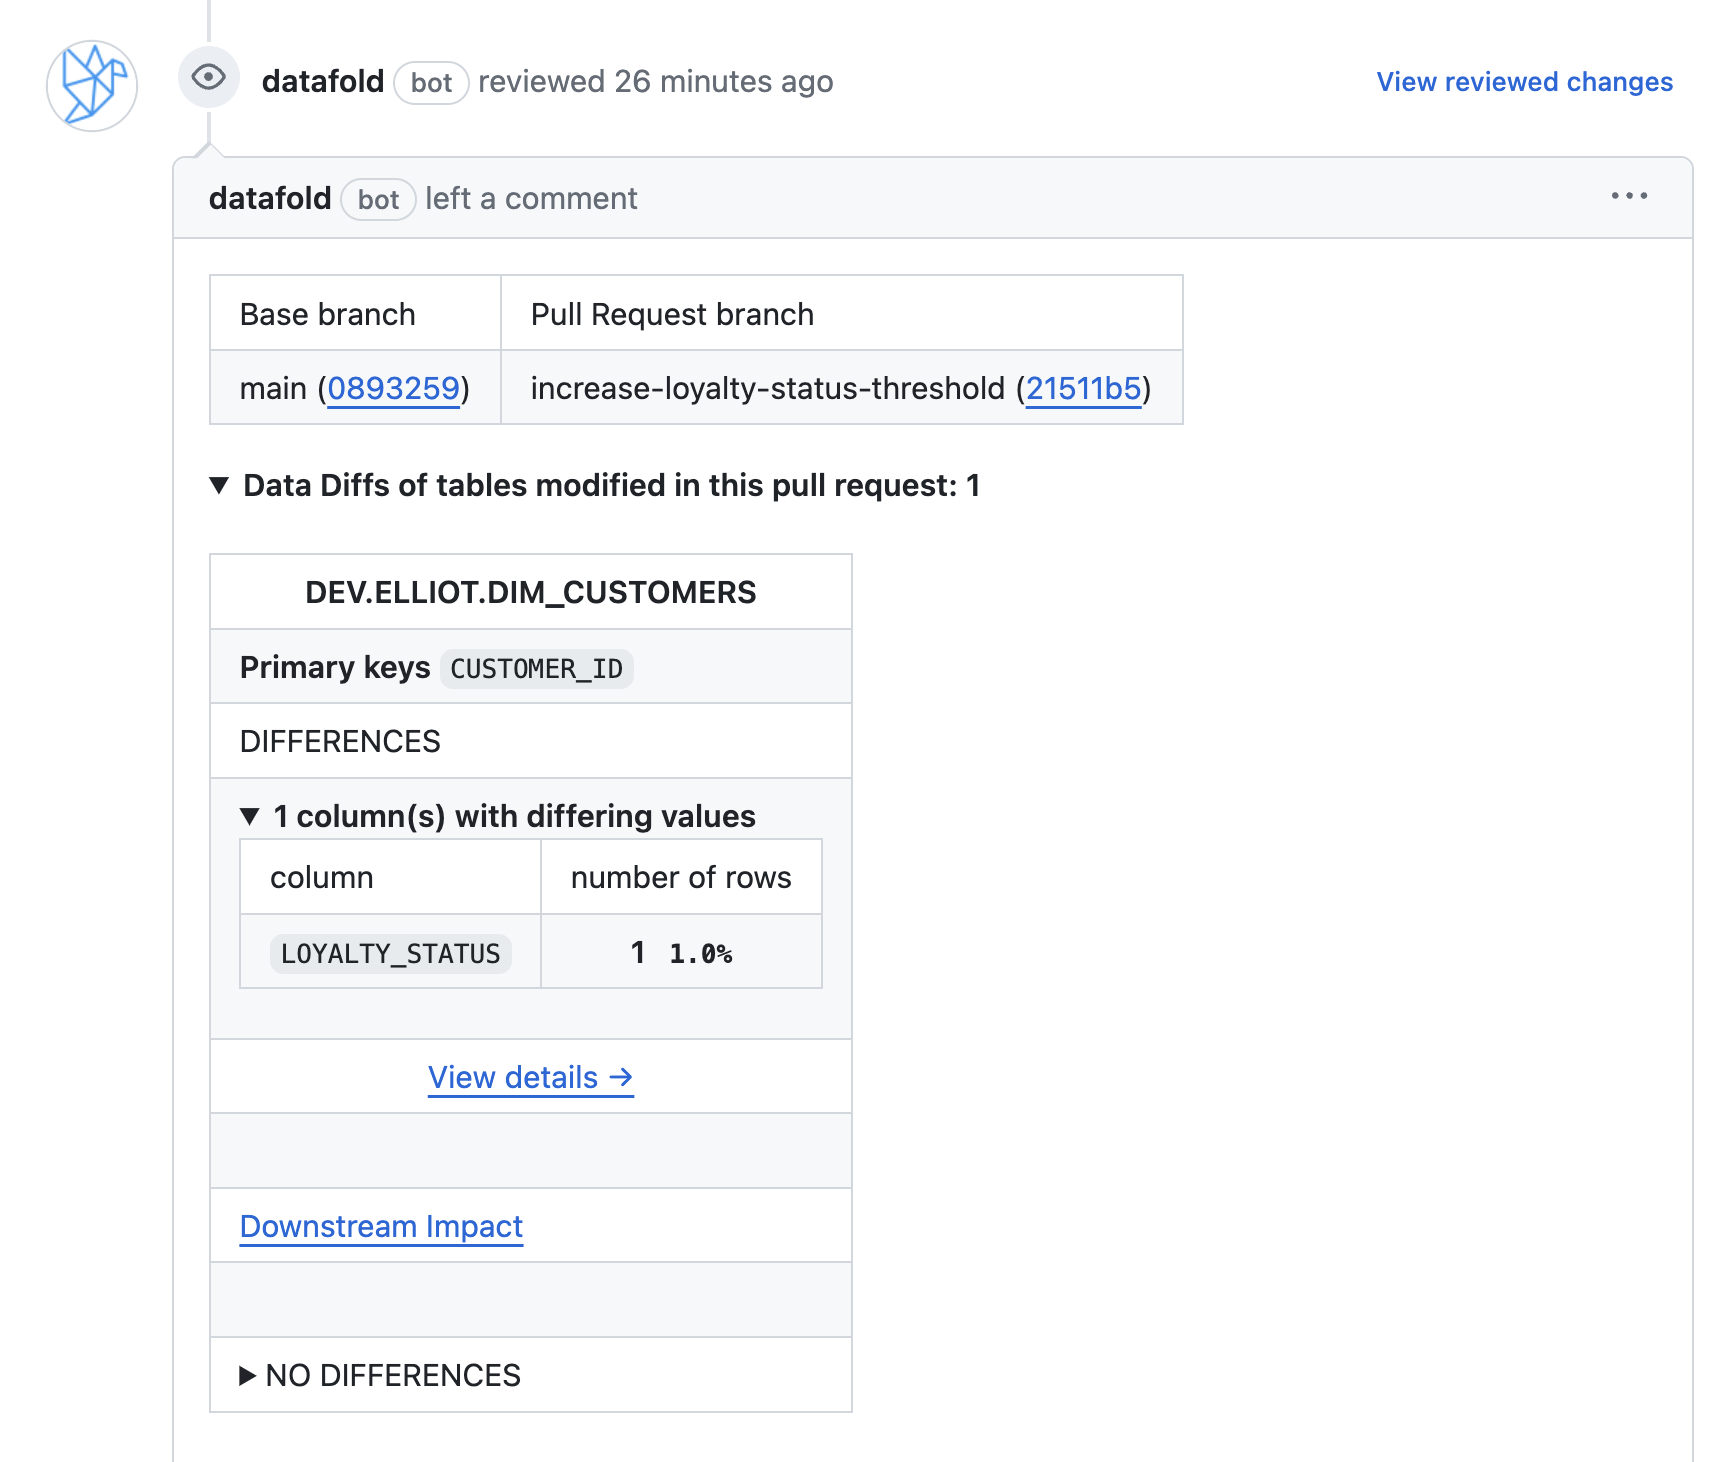
Diffing data at the value-level is a better way to validate your data. When we talk about value-level diffs, we mean looking at each row to figure out if any column values changed between different versions of code or data. Ideally, you’ll get information about how many rows changed and which column(s) contained conflicting values. Perhaps, something like this from Datafold Cloud:
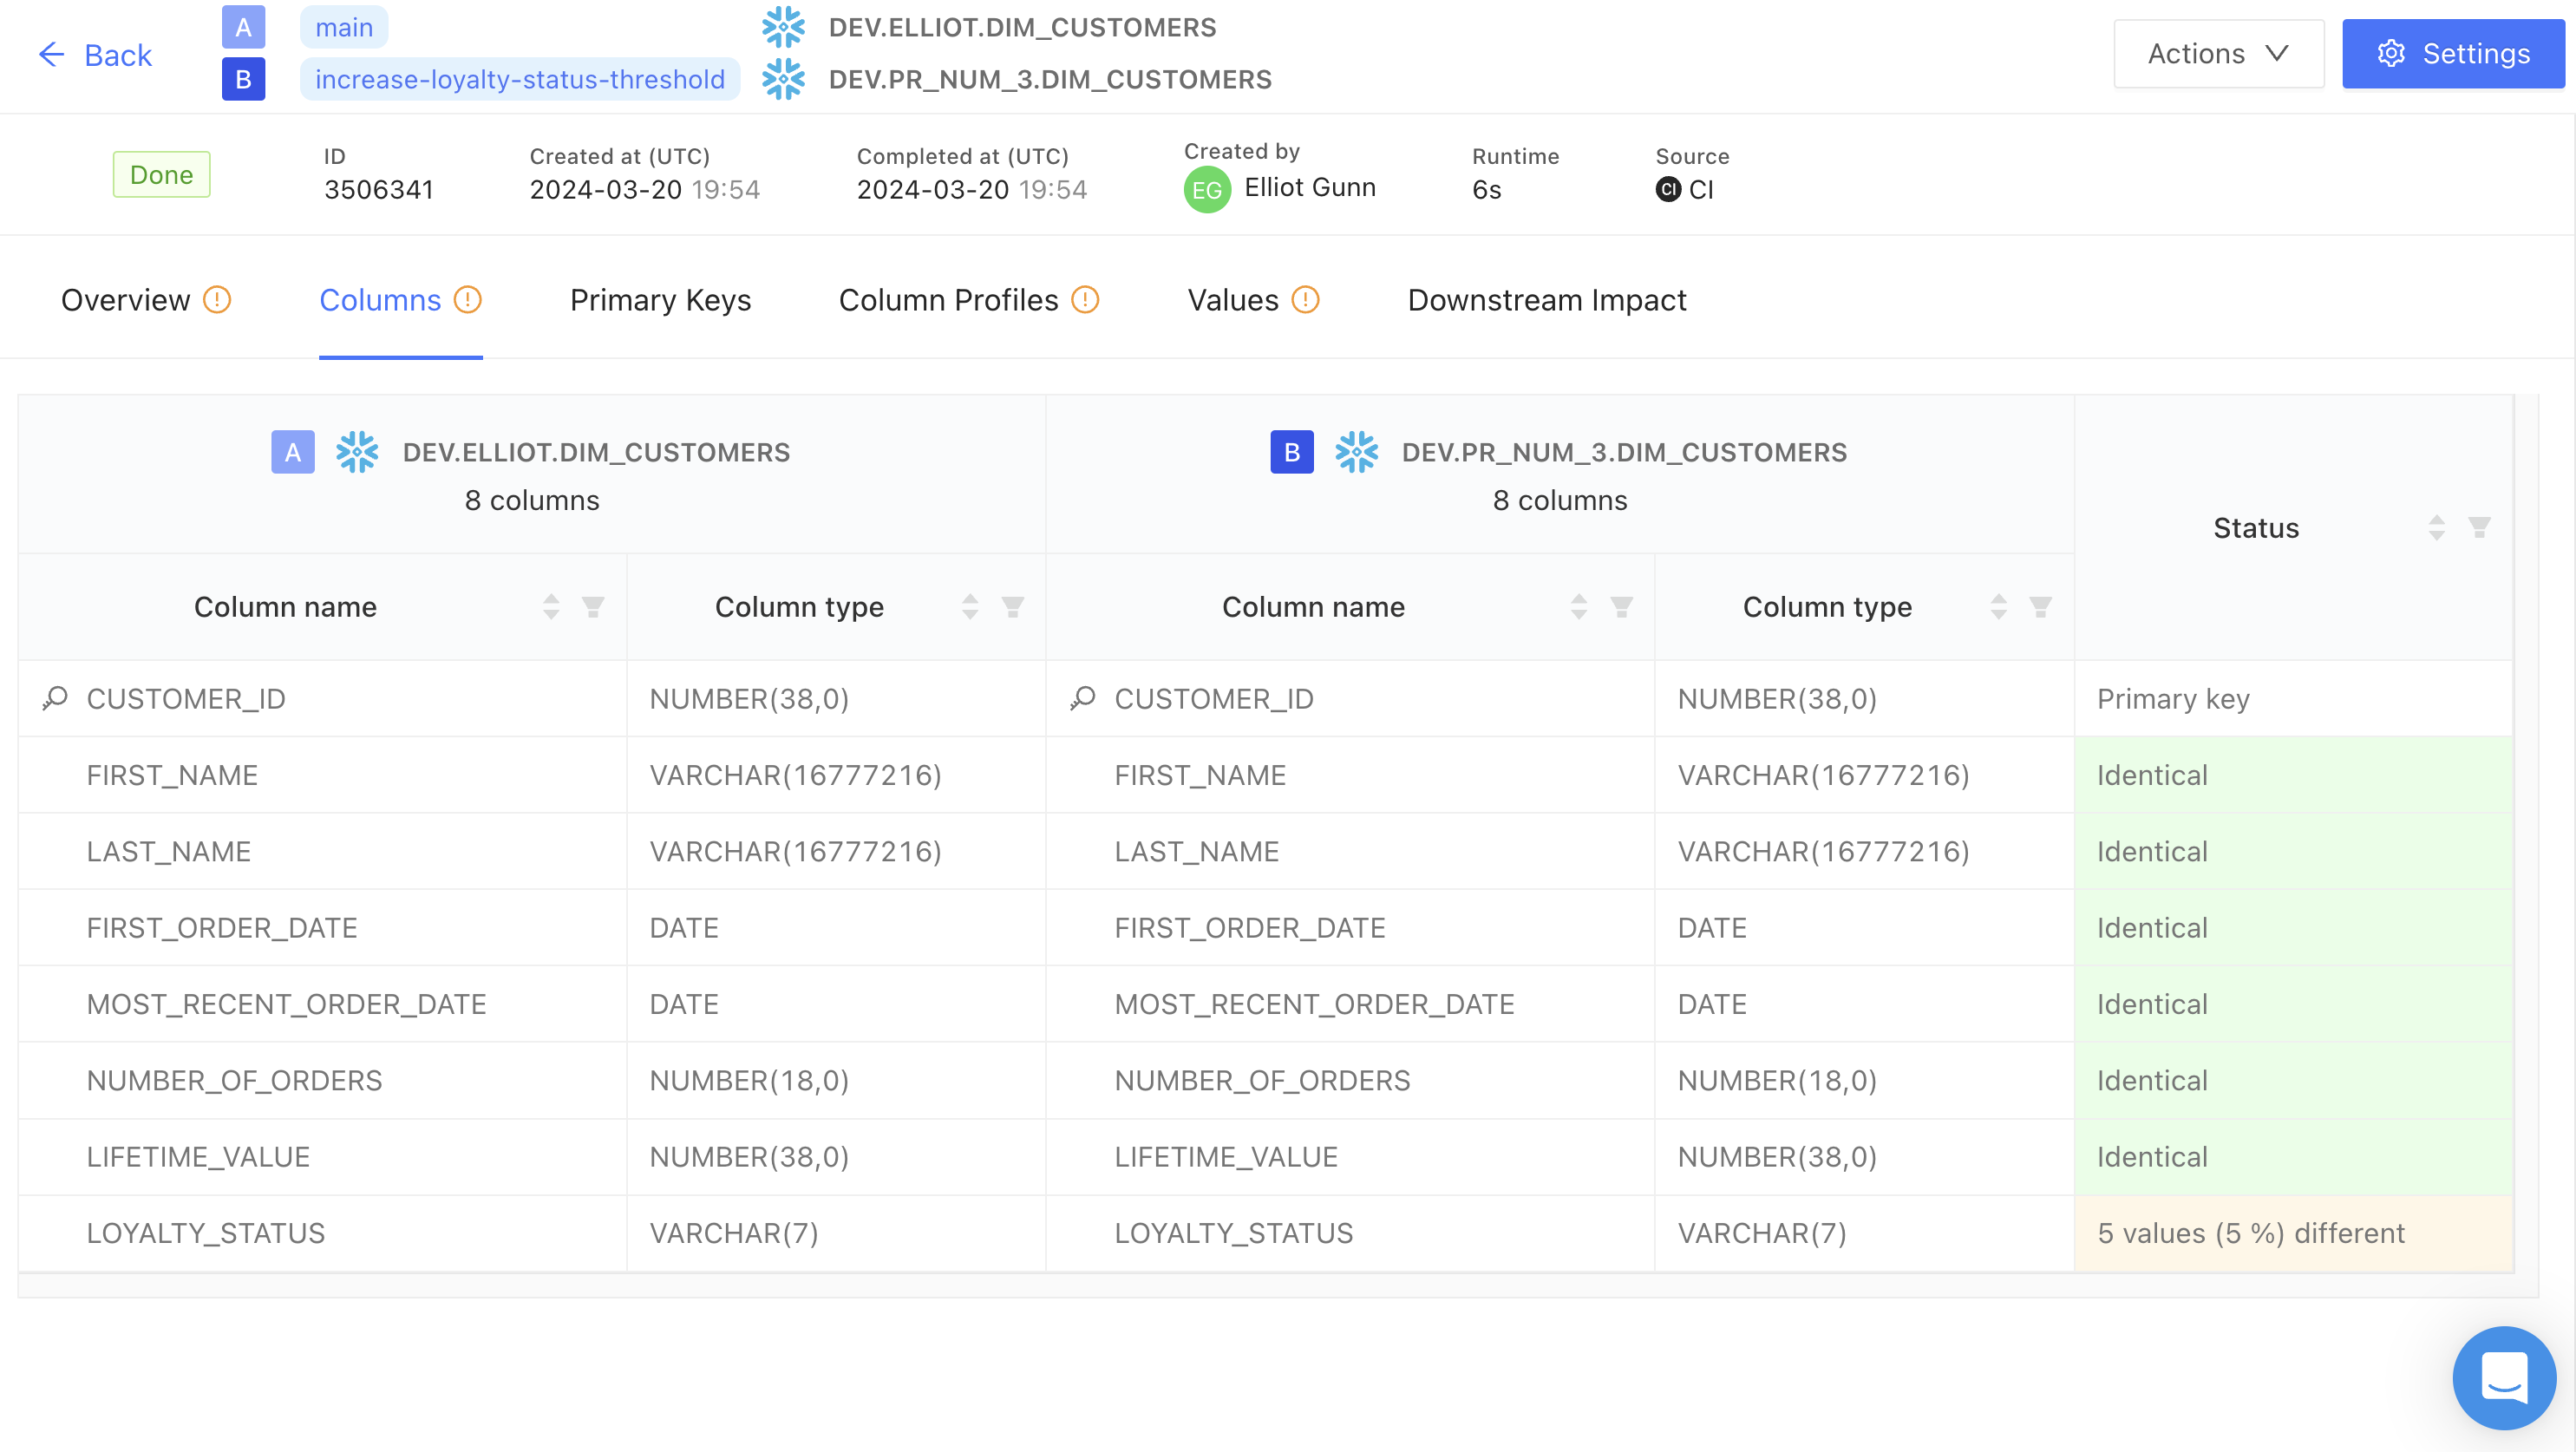
By integrating this within our CI workflows, Datafold’s Data Diff acts as a gatekeeper to prevent bad data from reaching production and impacting business outcomes, and your team has the agency to investigate any value-level discrepancies or unexpected changes
Set up Datafold Cloud
Let’s jump into setting up our second integration. If you don’t already have Datafold Cloud, you can sign up for a 14-day trial here.
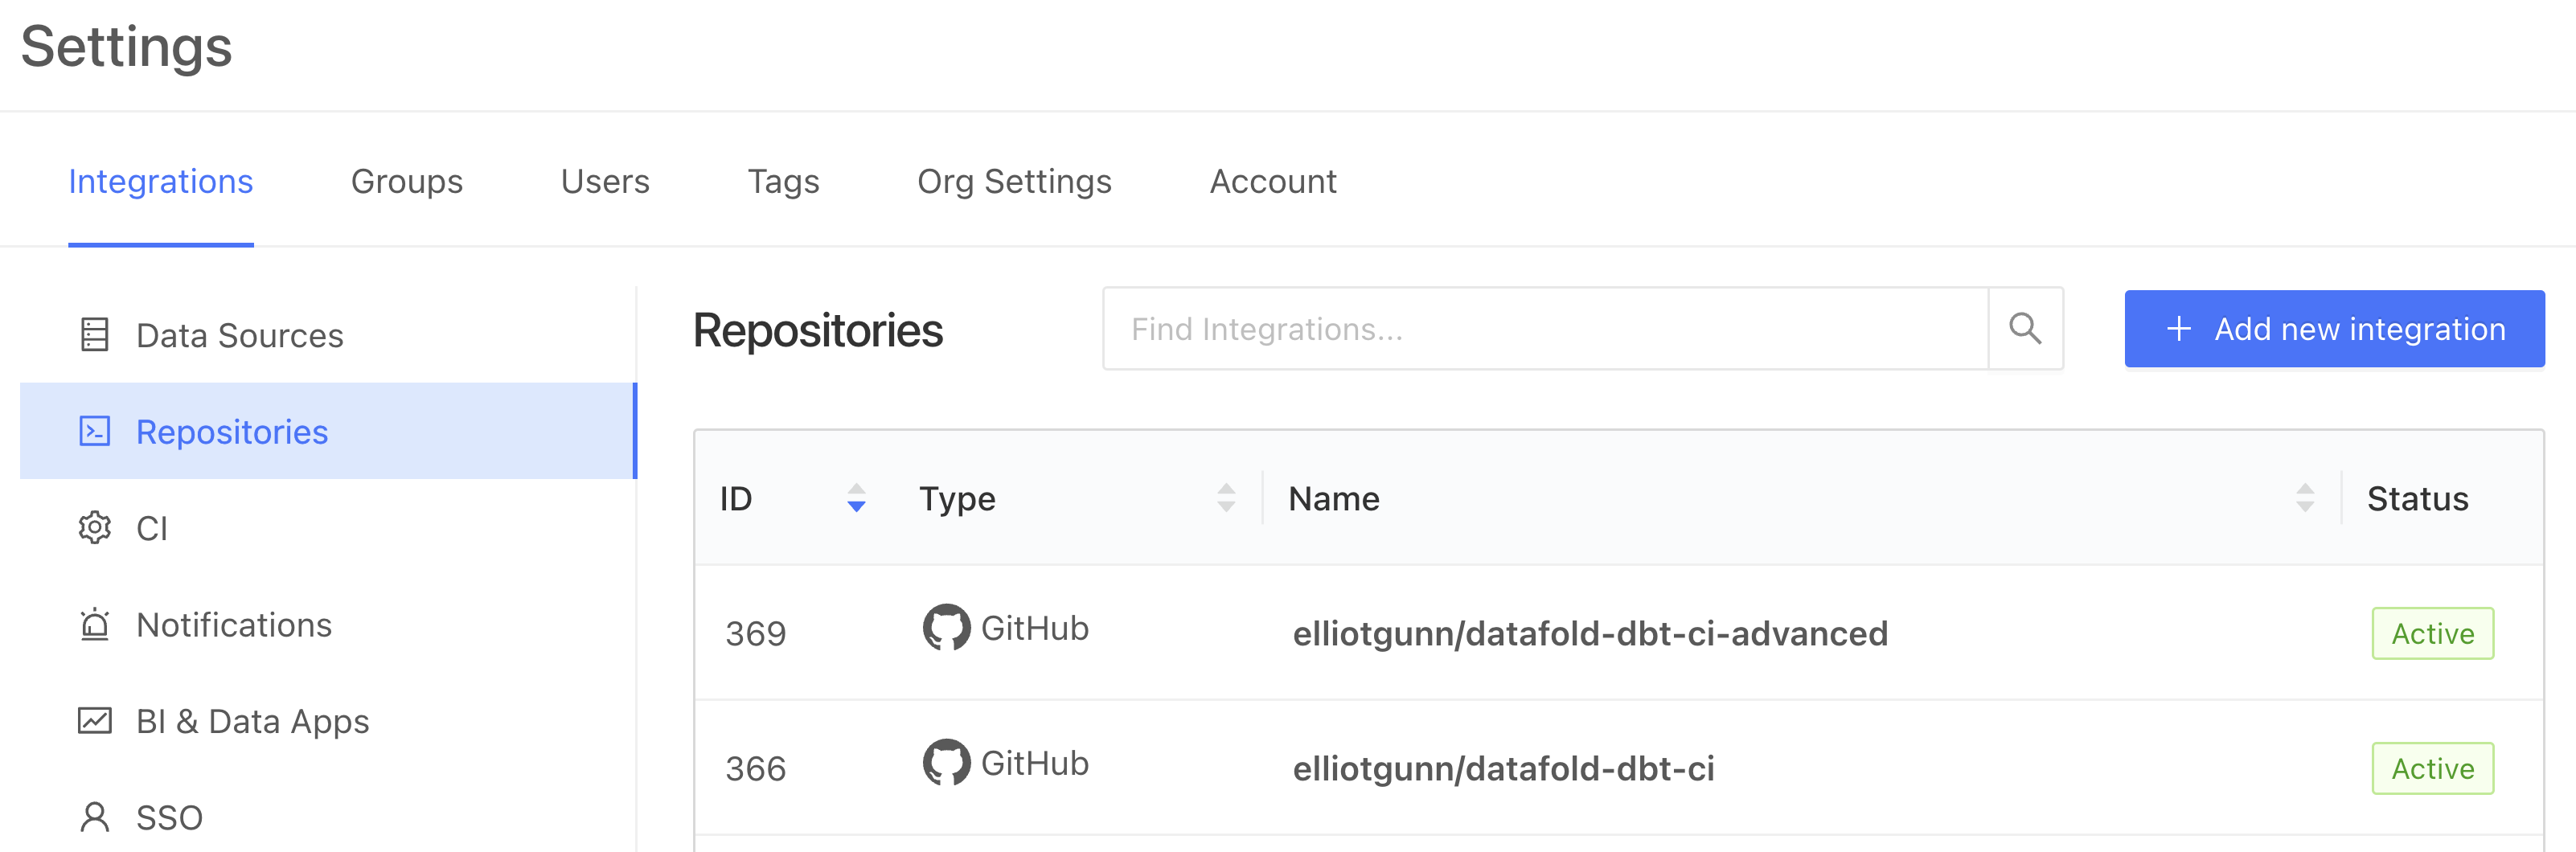
First, under Datafold Cloud’s Settings, add your Repository integration (choose between GitHub, GitLab etc). You can choose between installing Datafold to a user/org’s entire group of repositories or just select ones.
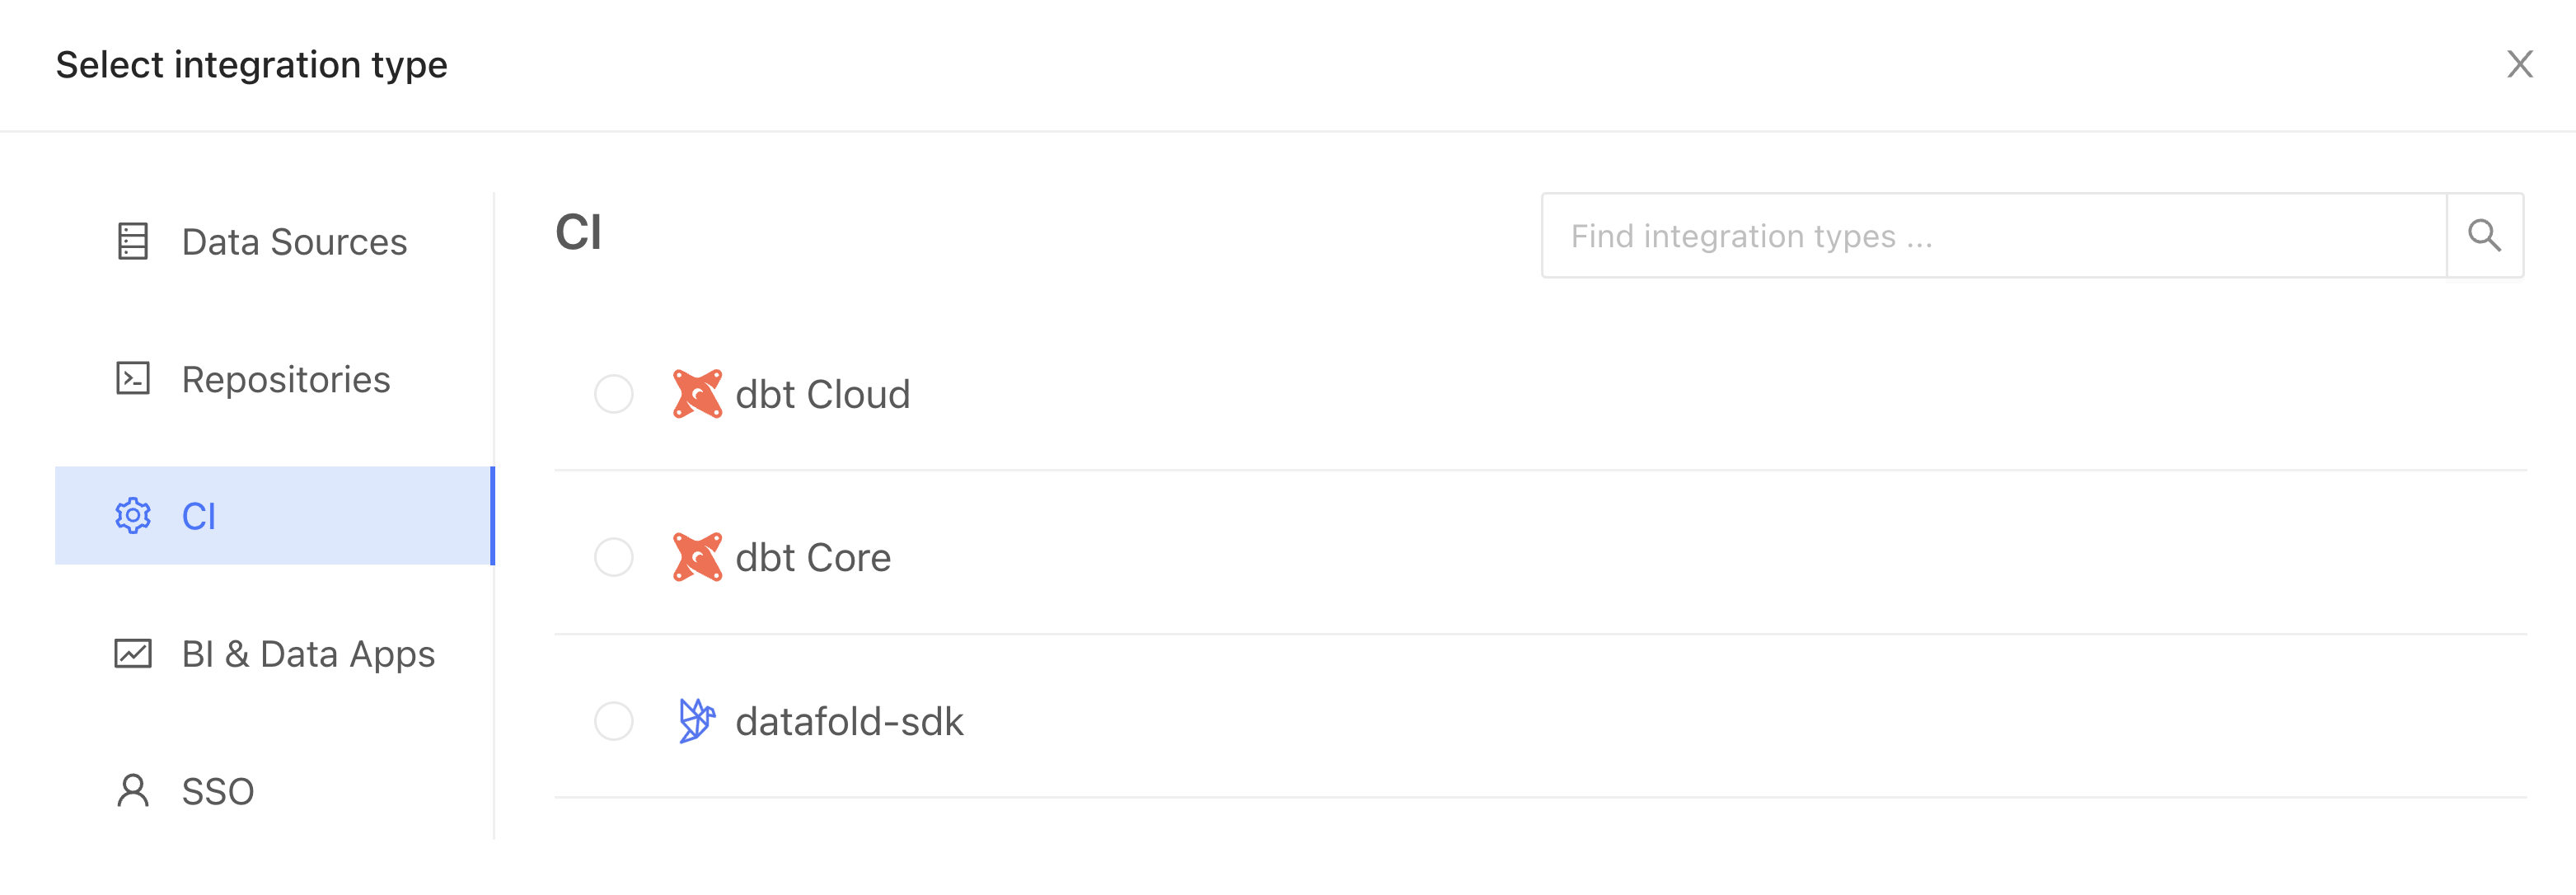
Then, under Settings, head to CI to add a new CI integration for dbt Core (if you’re using your real repo and you’re a dbt Cloud user, you’d select dbt Cloud here):
Where you’ll just need to figure out four things: configuration name, repository, data source, and primary key tag (defaults to “primary-key”).
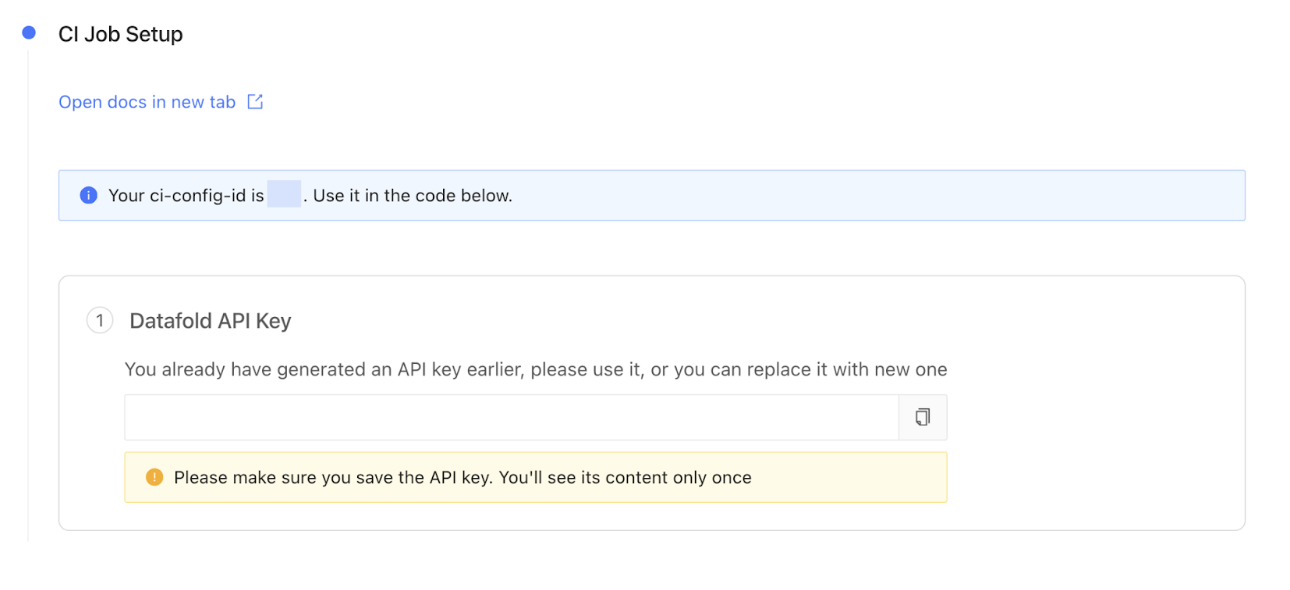
Next, Datafold then guides you through the CI job setup. Generate a new Datafold API Key and obtain the CI config ID. Add the DATAFOLD_API_KEY to your GitHub repository as a secret (recap: learn how to add GitHub Actions secrets here) .
Datafold’s dbt Core integration creation form automatically generates scripts for integrating Datafold with your CI/CD pipeline. Add this step to our dbt-pr-ci-job-staging.yml file (not the pre-commit one!):
Each time dbt is run it creates artifacts, which include the manifest.json file so critical for Slim CI and many other files. When we submit artifacts to Datafold, what we’re doing is sending the same manifest.json to Datafold so that it also has information about the state of your dbt project in the current PR. It tells Datafold which set of code/data changes should be tracked, and Datafold can then use this to run data diffs comparing your production data to development data.
Update your dbt configuration
Then, add your prod configuration to your profiles.yml file:
Next, update your dbt_project.yml to include your production database and production schema. These should match your just updated profiles.yml prod configuration.
Update requirements.txt
We have a couple more changes to make. Make sure to add the additional dependencies requirements.txt so that it contains everything you need to run this repository:
Test run
So far, we’ve been modifying code and adding new files, but we haven’t actually run anything. The first thing you have to do locally is run:
By specifying --target prod, you're indicating to dbt that you want it to use the configurations defined for the prod target in your dbt_project.yml and profiles.yml files, such as database connection details and schema settings.
First, run your dbt-pr-ci-job-deploy.yml file so that it uploads the production manifest.json file to Datafold:
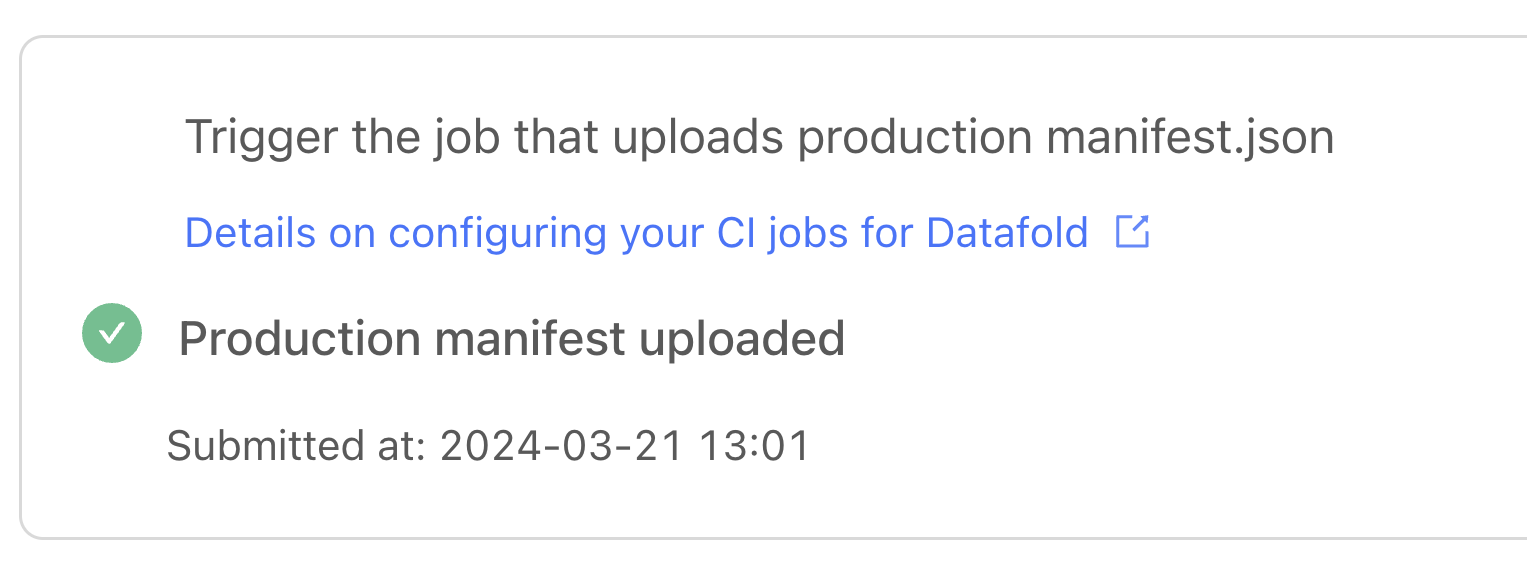
We’re ready to test it out: try opening a new pull request with changes to trigger the workflow. Datafold Cloud will let you know whether your PR manifest has been uploaded. Success!
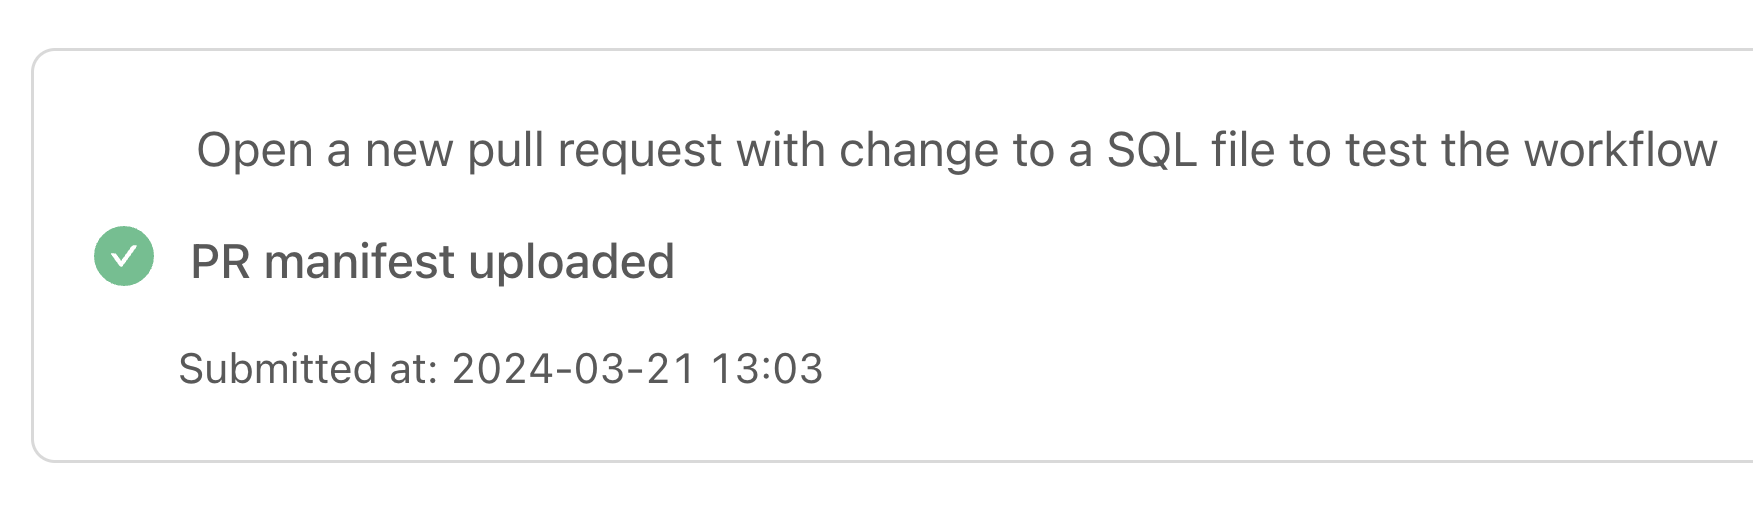
Now, whenever you open a PR, Datafold will trigger a Data Diff for your modified (and downstream models), and automatically add a comment in your PR showing the differences between your staging and prod tables:
Keep everyone in the loop with Slack notifications
The third integration is a fun one: we’ll add Slack notifications that are tied to a CI workflow to notify you of success, or perhaps more critically, of failure.
We use Slack notifications in our own internal analytics repository (which you can read more about here) as it’s super helpful for providing real-time updates on CI events and pipeline statuses as our team works across time zones. If a critical failure occurs, our team is empowered to respond promptly to issues.
Setting it up is fairly straightforward and can be done in two parts.
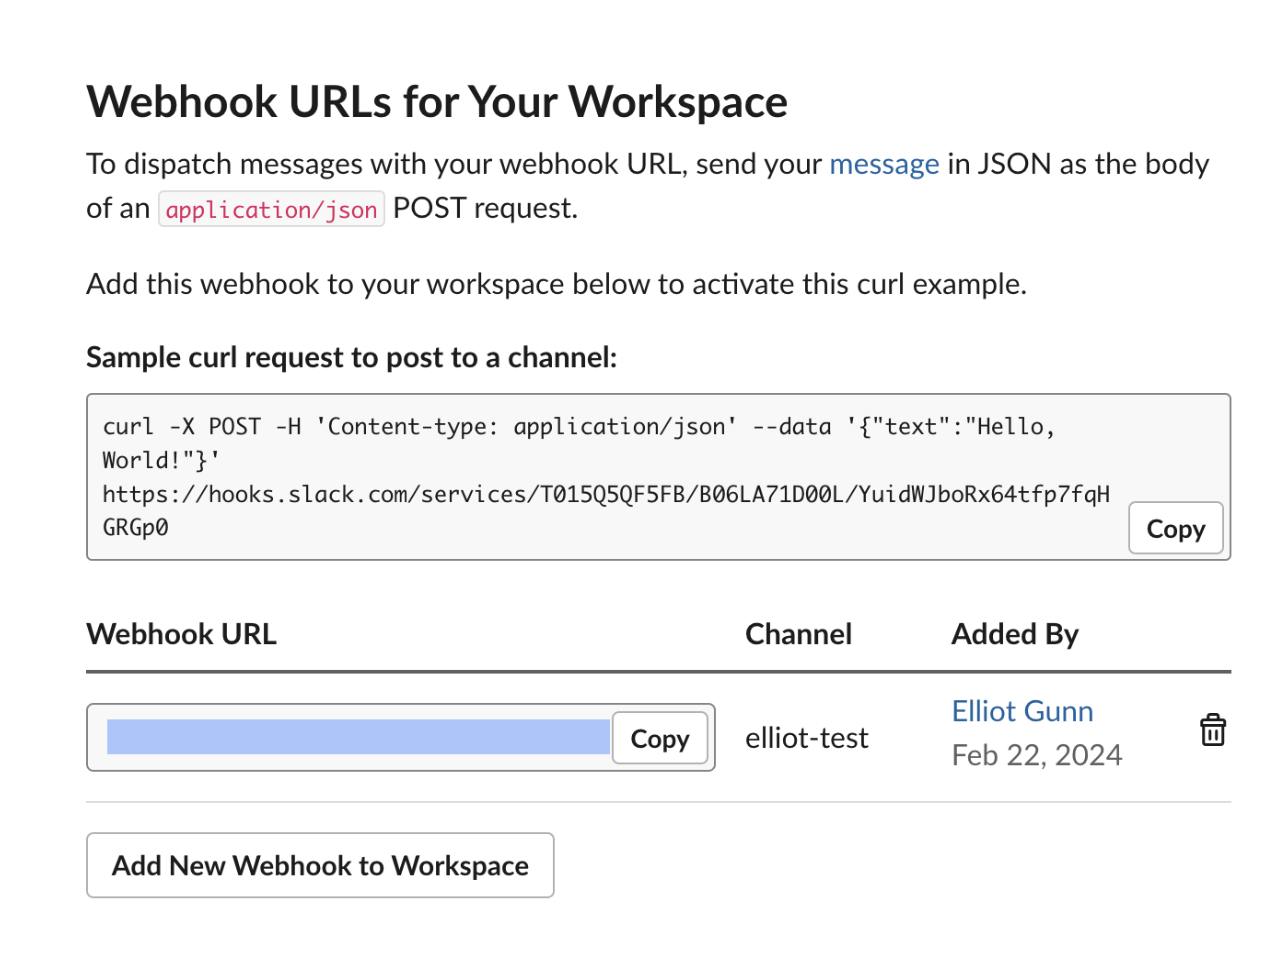
Set up the Slack incoming webhook
The first part is to obtain your Slack incoming webhook. You can follow the more detailed instructions here, but it’s not necessary as I’ll be guiding you through the entire process here. Webhooks are special links that we need to connect GitHub Actions and Slack, which we will store in GitHub Secrets as a secret value.
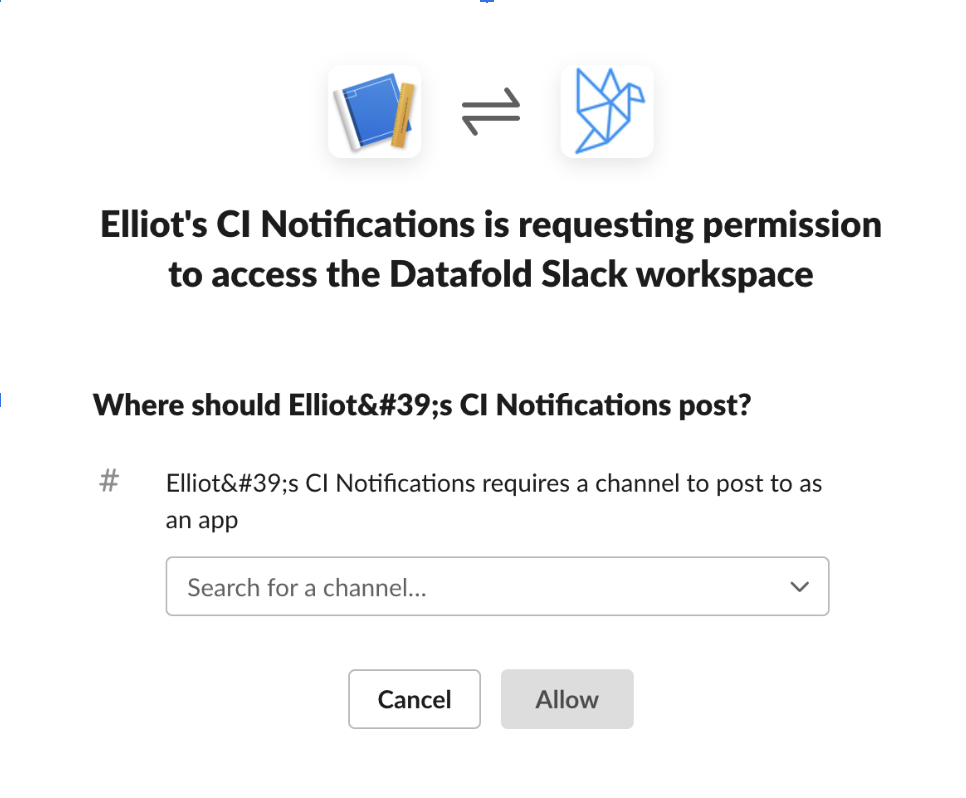
Head over to the Slack API page to Create your Slack app, which we’ll be building From scratch.
It will then prompt you to pick a workspace: you should pick the Slack workspace you want the Slack notifications to be posted to.

Then, scroll down to the Incoming Webhooks settings to activate it.

Next, click on Add New Webhook to Workspace and select the channel you want to post to. If, like me, you’re just testing this workflow out for the first time, I recommend creating a private channel in Slack so your notifications don’t disrupt communication. I named my private channelelliot-test. (For actual production checks, you probably want to send notifications to a #data-alerts channel or something similar.)
And, you’ve just successfully created your first Slack Webhook URL:
Set up Slack notifications in CI
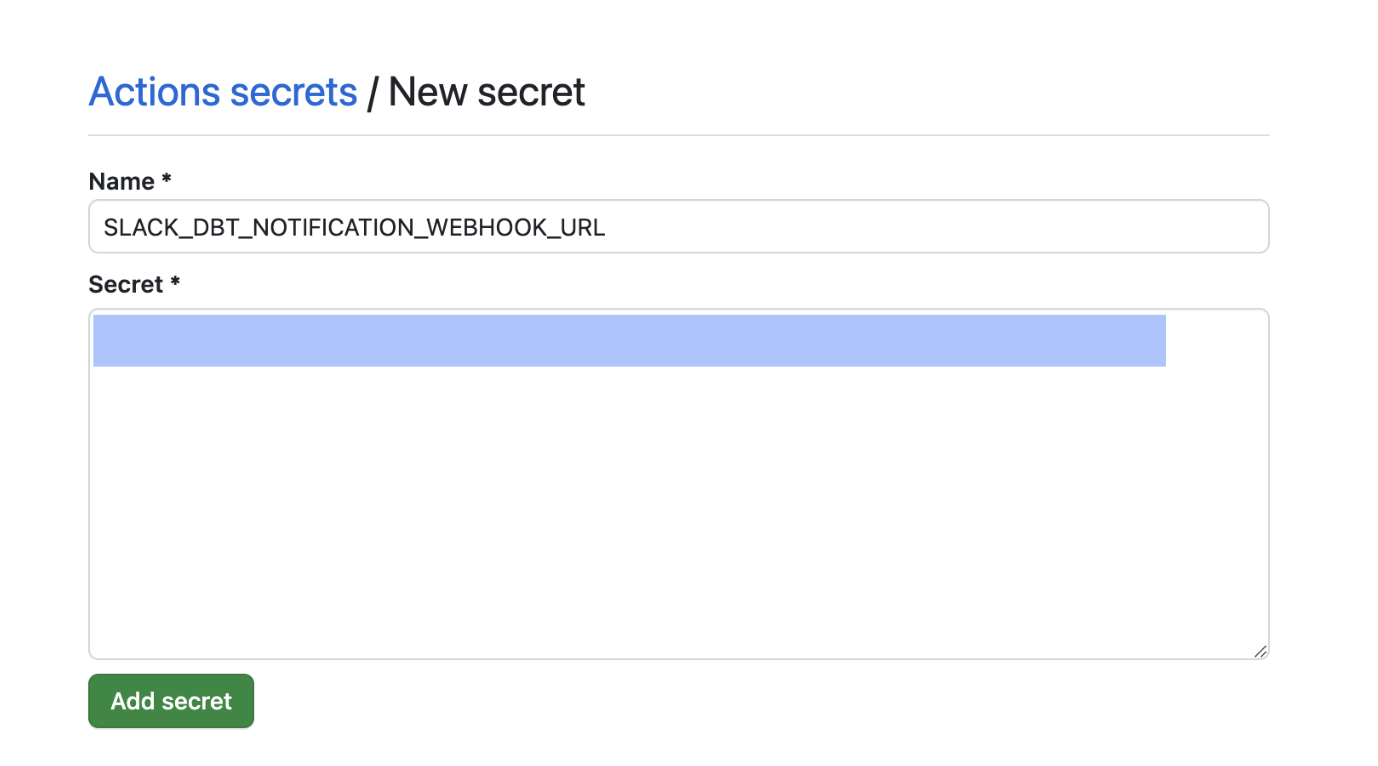
Now we need to add this as a GitHub Secret, which is named SLACK_DBT_NOTIFICATION_WEBHOOK_URL. You can change this to something else, but if you do, make sure to change it in the GitHub Actions file so they match.
Next, we’re going to add the Slack notification step to our GitHub Actions workflow. I used the same code from a previous article. Make sure to update your Slack member ID in the code snippet (learn how to find your ID here).
This looks a bit gnarly but it only has one purpose: to update your Slack channel with a success or failure update along with the workflow name and branch. If it fails, it’ll tag a Slack user (which can be you, or several folks on your team). If you want a deeper technical understanding, what this code does is make HTTP POST requests to a Slack webhook URL and formats the messages using JSON with Block Kit elements for formatting. You can customize this to have more detailed messages or with a different formatting too, but we kept it pretty simple here.
GitHub Actions success
Let’s bring this together and test it. Create a new branch, edit some code, and create a pull request to trigger the workflow automatically. After a few seconds or minutes, you’ll get a notification in Slack:

Brilliant! Let’s head to the GitHub Actions tab for more information:
In our next article, we’ll end our 3-part series with a strategy for interpreting CI check results in your dbt project.
What should your CI data pipeline look like?
If learning about advanced CI integrations that can make your data workflows easier and error-free sounds exciting, your data team might be ready to elevate their data quality game.
There are a few ways you can go further:
- Set up a free CI consultation with Datafold’s CI expert to talk about what CI setup makes sense for your specific data environment and infrastructure.
- If you’re ready to start working on building CI for data, we have a free trial experience of Datafold Cloud, so you can start connecting your databases as soon as today.
Datafold is the fastest way to validate dbt model changes during development, deployment & migrations. Datafold allows data engineers to audit their work in minutes without writing tests or custom queries. Integrated into CI, Datafold enables data teams to deploy with full confidence, ship faster, and leave tedious QA and firefighting behind.